Showing posts with label kids craft. Show all posts

Monday, October 08, 2012

Alphabet Banner- Guest posting for The Wood Connection and a GIVEAWAY!

Hey everyone!  I'm over at The Wood Connection today sharing the alphabet banner I made for the baby's room!
woodconnection

Last time I guest posted I was 22 weeks pregnant and on an organization kick,  now I am 33 weeks and its crunch time getting the baby's room done.  I headed over to The Wood Connection knowing I wanted to make something cute for the nursery.  I was immediately drawn to their cute pennants for banners.  The only problem is that this baby doesn't have a name yet.  (We are having a really hard time in the name department this go around!)  So what else can you have a banner say?  The alphabet!  I collected 26 of their pennants and headed home to get to work.

Wanna see how it turned out?


So much fun!

And now, thanks to The Wood Connection, I have the first corner of the nursery officially done!


For more details head on over to The Wood Connection and check it out!

But that's not all!!!

 GIVEAWAY  TIME

This giveaway is now closed.

The Wood Connection has so kindly offered to give one of YOU a $25 gift certificate to their store! They are located in Salt Lake City, Utah so whoever wins will have to be able to get to their store to use it. They have some of the cutest wood craft kits and everything is all ready to go, making it super fun and easy to spit out some cute creations!

 To Enter Leave me a comment on this post! 
 (that's it, super easy right?!)

 Extra Entries
 (leave a comment here for each one you do)

 -Visit The Wood Connection Blog, look around, and let me know one of their crafts that you would love to make.
 -Be a public follower of Sassy Sanctuary

 Good Luck!!!
Monday, September 10, 2012

Woodland Baby Mobile

In case you missed it, I wanted to share my DIY baby mobile that I made for "crafting with/for kids" week over at Wood You Like to Craft.  Enjoy!

________________________________________________

Hello everyone! Krystal from Sassy Sanctuary here today to share my take on this month's "crafting with/for kids" theme. With a baby on the way I had use this as an excuse to cross off another thing from my nursery to-do list. So I went more with the crafting "for" kids route. Also, I have to confess that while there is a wood element, this is not an entirely wood project. Hope no one minds!

Anyway, if you go on Etsy and search "woodland mobile" you will find a bunch of adorable mobiles with little felt animals.  It took one look and I knew I had to have one for my woodland nursery, but since most range upwards of $70, I also knew I would have to DIY it.


So I went and gathered some felt and embroidery floss, found my favorite little animals from Etsy to shamelessly copy, and set to work.  Here is how it turned out.


I am so happy with it!  I really wish everyone could come over and see it in person since it was really hard to photograph and the pictures just don't do it justice.  But hopefully you get the idea!

We have an "elf house" (which I copied off the fabric I'm using in there)


An Owl...

 A Bear...


A Fox...

A Hedgehog...


And my favorite, the Raccoon.


And now where the wood comes in.  All these little guys needed a place to hang so I made a simple wooden mobile frame.


All you do is take a wooden block, drill holes in the four sides and insert dowels (add some glue to the holes).  I then capped the dowels with dowel caps.  All the supplies were found at Micheal's.  Then just stain or paint however you please.  There are also eye-hooks on the top and bottom of the block to hang from.

So that's it.  My DIY woodland baby mobile.


And just so you don't feel too bad for my kids, let me show you what my 6 year old son did while I sewed.


I cut him squares of felt, armed him with a needle and some thread, showed him how to do a simple whip stitch, and let him go to town.  He spent hours making this little "blanket" and is so proud of it.  And I love how entertained it kept him!  So yeah, no matter what you are crafting on, give your kids some of your scrap supplies and see what they can do.  Their creativity might amaze you!


As always I'm linking to these great parties and events:

Monday, January 09, 2012

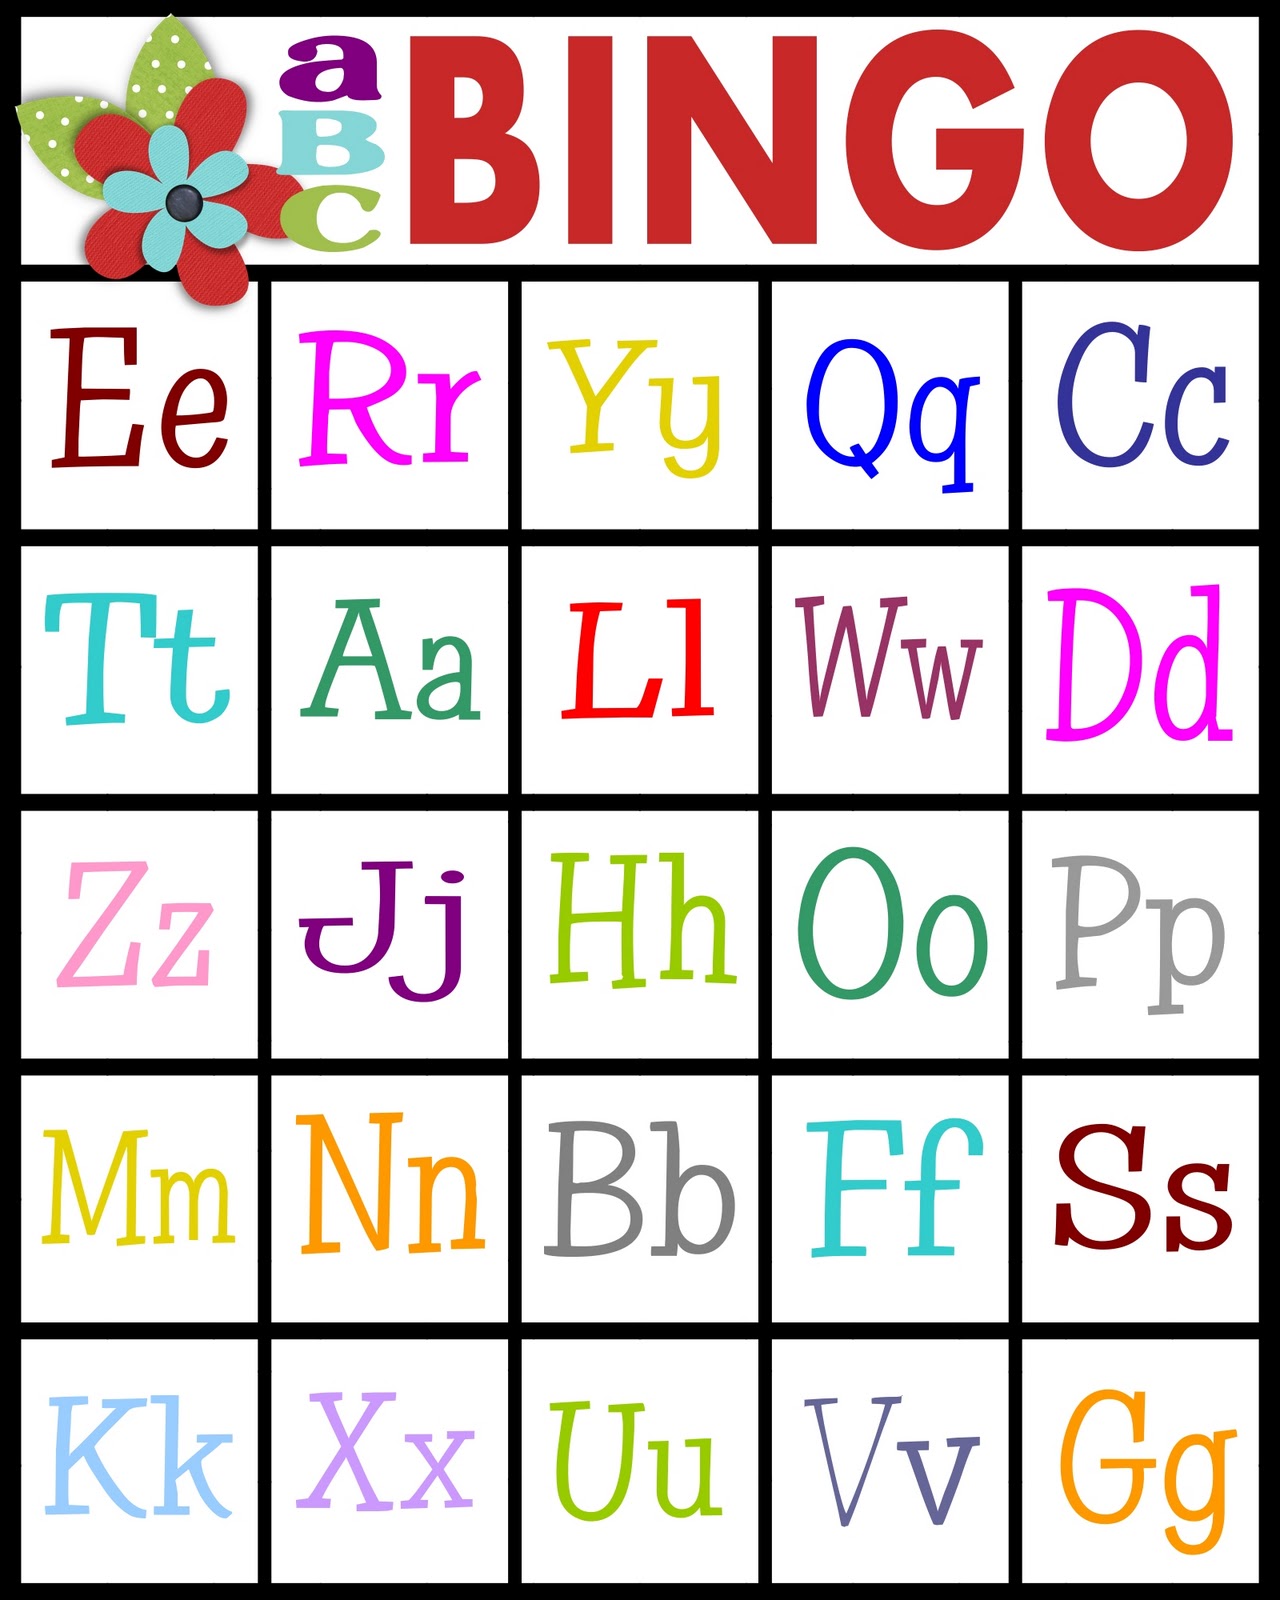
ABC's Bingo- free printable!

I have a little kindergartener who is working on learning his letters and letter recognition.  In order to help him with it at home I made an ABC bingo game.  It turned out pretty cute and has been a great way for us to review.

I also have used it with my preschooler.  It has been really versatile.  For a beginner game, you can say the letter and show the card and let the kids find it.  For a little more challenge, just say the letter and see if they can find it without seeing what it looks like.  And for a more advanced game you can say the letter sound and have the kids find the letter that goes with the sound.

Anyway, I thought it might be nice to share.  So if any of you have little ones that need help with their ABC's, play some bingo!


I made 8 game cards plus the calling cards.  Just print as many as you need onto cardstock and cut out the calling cards.  Enjoy!

PERSONAL USE ONLY!


As always I'm linking to these great parties and events:

Sunday, December 11, 2011

Snowman Ornament- Kids Craft

I was asked to come up with a Christmas kids craft to do with my son's kindergarten class last week.  So I hit up pinterest and was inspired by all the cute popsicle stick ornaments.  Turns out you can make anything from a Santa to a Christmas Tree to an Angel out of a popsicle stick!  I decide to make Snowmen since they looked like they would be simple and I was dealing with 15 kindergarteners.  :)

All you do is have the kids paint a popsicle stick white with craft paint. Tell them to be careful not use too much paint so it will dry quick.  Then they can glue (regular white glue) buttons down the front of it.  I had pre-cut little hats from black foam and the kids stuck those on with foam tape. (once the paint had dried) The scarf is made from a pipe cleaner and the kids all drew faces on with markers.  Once done, I hot glued a loop of yarn to the back so they could hang them on the tree.  They all turned out super cute and all 15 kids had their snowman made in about 30 minutes.

Here is how they looked.


Cute!

They were a blast to make with the kiddos.  :)
Thanks pinterest!

(you can find the original inspiration for these HERE)


As always I'm linking to these great parties and events:

Tuesday, November 22, 2011

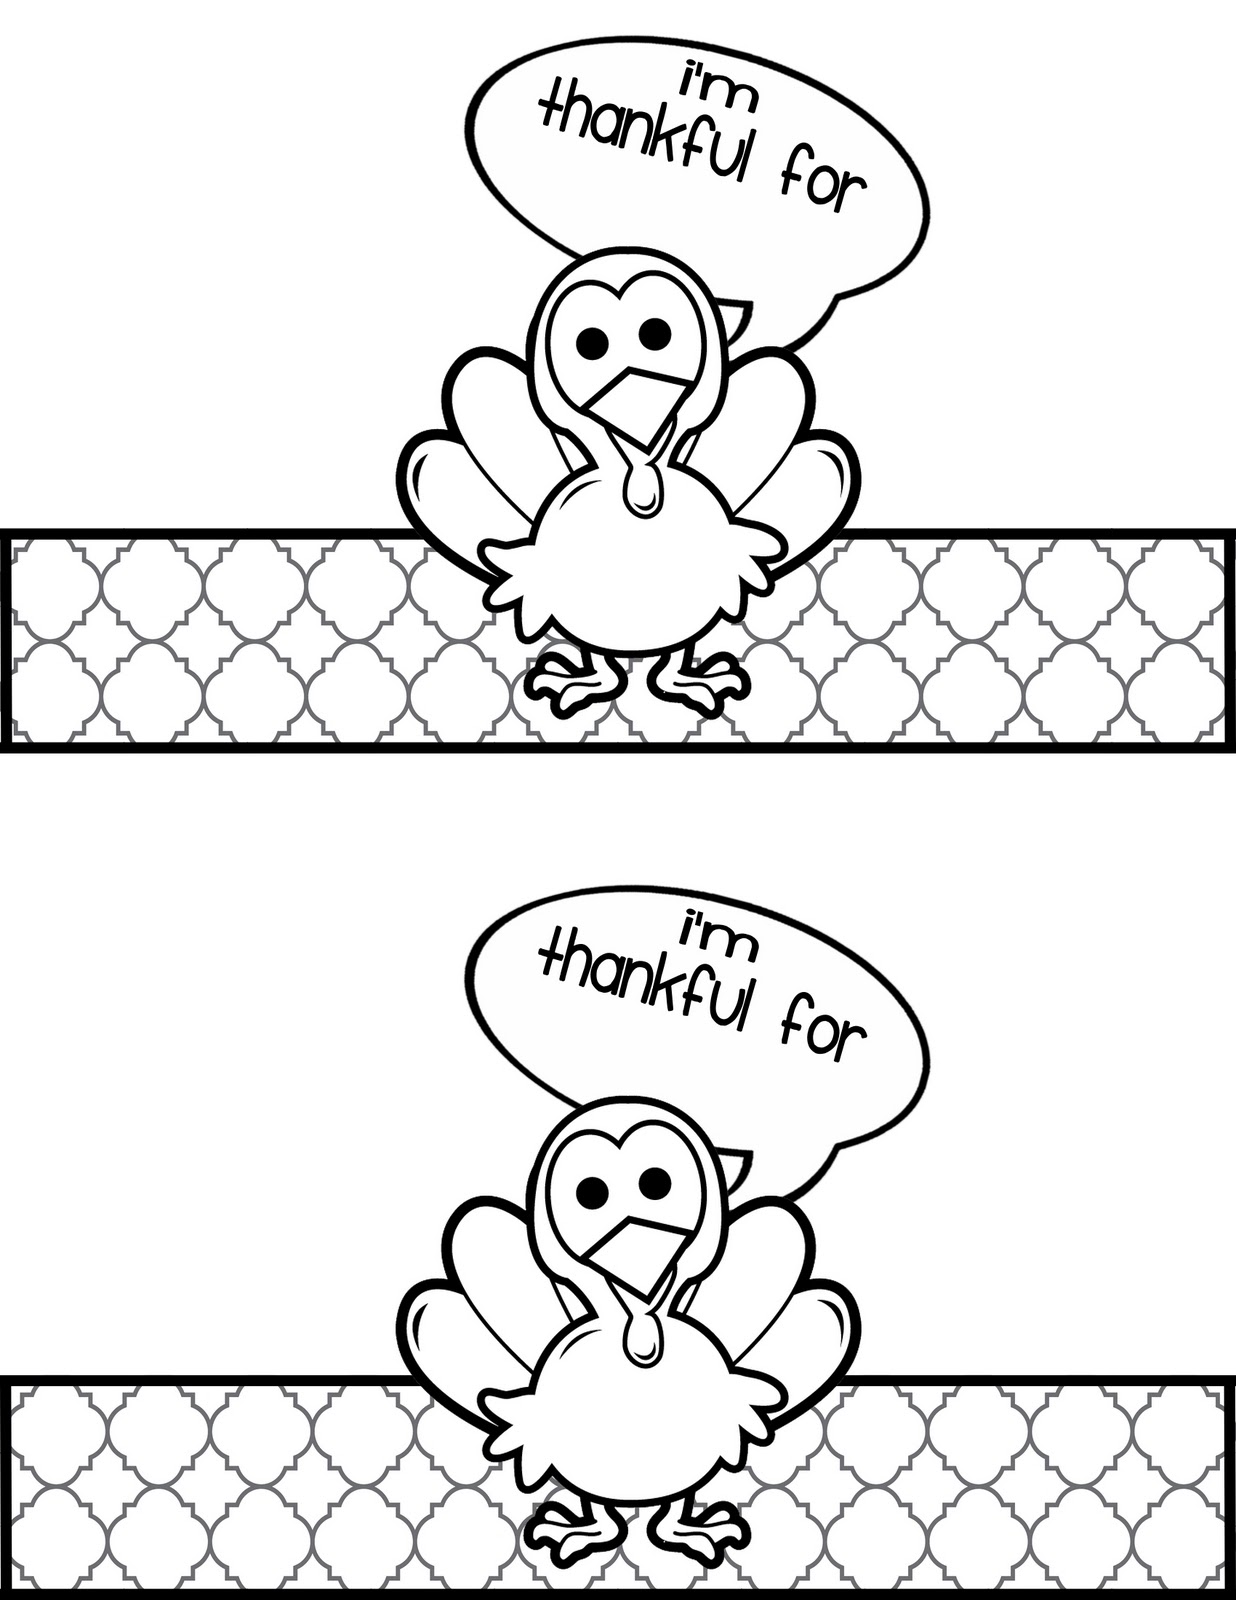
Turkey Place Card Printable- Kids Craft

I know this is super last minute, but I wanted to come up with a little craft for my kids to do on Thanksgiving while we cook.  My thought was that if I could come up something that helped them feel apart of the preparations, maybe they would actually appreciate enjoy the feast more.  So I made these little turkey place cards for them to color.

All you need to do is save the image, print it on card stock and let the kids color.  You can either put everyone's name on the cards or have the kids write things they are thankful for.  Then cut them out, tape them into a ring and use as either a place card or napkin ring.

I made up one as an example.  For this one I just opened the file in MS Paint and colored it that way.  Here is how they look all made up.


 Cute!

I'm sure the kids will have fun making them and it will be cute to see how they color them.

Here is the file


Just click to view it larger and then save the image.  They are created to be printed on a regular letter size paper.

And here is the one I already colored in case you don't have kids to color them for you.  :)  But once again, if you want to do your own colors just open the black and white version in paint and have fun!


I do ask that you please be a follower of this blog before using these files.  And I also want to credit Homemade Preschool for the cute Turkey I used in these printable.

I hope you enjoy and Happy Thanksgiving!!!

As always I'm linking to these great parties and events:

Wednesday, August 17, 2011

Tutu Table


So... the next thing that I added to Ava's "big girl room" is a tutu table.  She had a birthday last month and I wanted to get her a play table to have tea parties and such on.  Turns out kids tables can be pricey!  After scouring the internet I came upon the perfect table from Ikea.  We don't have an Ikea where I live so I had to plan a trip to Utah to get it.  When I got there, the table was on clearance for $29 and I grabbed the last one.  Soooo lucky!  They must have discontinued the particular one I bought because I can't find it on their website anymore.  Sorry folks!

Here is what it looked like before.


 I love that it was round, already white, and had shelves for all her junk things.

I knew that I wanted to "make it mine" though.  Here are my inspiration images.


I loved the idea of a tutu skirt and a painted top.  So that's what I did!  Here is the "after."


Isn't it SO fun?!

It turned out very dramatic and ultra girlie, but its just perfect for her room.

I love how the top turned out.


I painted it completely by hand and am really proud of myself!

The skirt was really easy to do,  although it took 50 yards of tulle.  (Yes, you read that correct, 50 yards! Thank goodness for coupons!)  All you do is take a length of tulle, fold it in half and twist a couple of times, and then staple it to the bottom of the table.  Repeat all around the table till its done.  I found that using about 3 staples on each piece gave me the right spacing.


I did have to give it a hair cut once it was done to get the ends all even.

This method worked great for producing a full skirt.  I'm sure you could get away with less fabric if you wanted it a little thinner.

Did you notice the chairs?


Those were princess folding chairs that we already owned.  The frames were already a perfect color so all I did was unscrew the cushions and replaced the fabric.  I just used hot glue to glue the fabric down.  It was SO easy and now they are custom for her room.  Love that!


So that's it.  She now has the most girlie play table in the history of mankind.  And I love it!


I have a few throw pillows to make and then I will give you a full tour of her bedroom next week.  So stay tuned!

As always I'm linking to these great parties and events:

LinkWithin

Related Posts with Thumbnails
Don't stop there! Click "older posts" to keep reading!