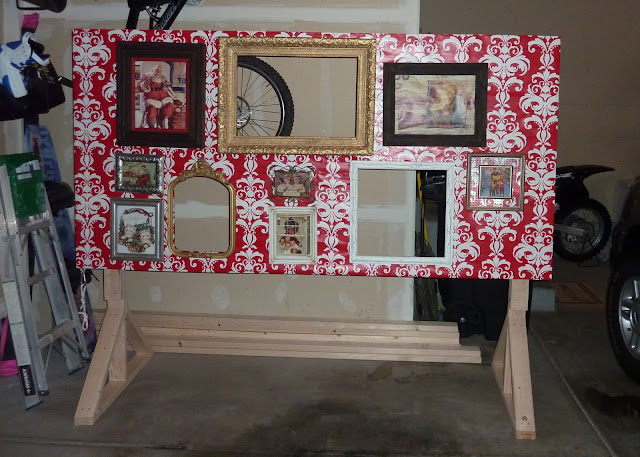
It all started when my BFF Cola (you are going to hear more about her and her new blog soon) and I were having a play date and came upon this idea. Cola, who is very entrepreneurial, saw this as a fun fresh idea with dollar signs in mind. I saw it as seriously cute Christmas card potential. So we decided to work together and make our own Christmas inspired "wall of frames" photo booth. Before I show you all the how-to's and details, here is the finished product. My 2010 Christmas Cards, coming soon to a mailbox near you!
Here is the final family photo minus all the card junk.
So fun right?!? I love it and we are so impressed with ourselves.
Here is what we did.
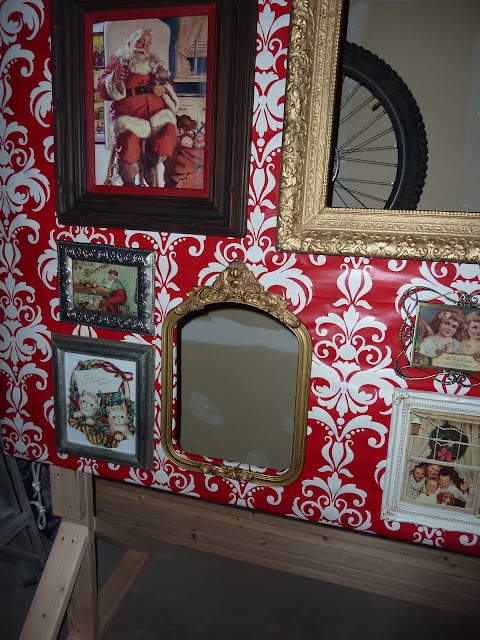
We gathered a bunch of old frames from thrift and antique shops. We wanted it to look like it could be a wall at your Grandmother's house so we went with a very eclectic "gathered over time" look. We painted several of the frames that needed it. We decided which three were going to be our openings (the three that were big enough for a person to stick their head through) and settled on a layout. We then filled the rest of the frames with Christmas pictures printed from online images. Cola was the mastermind behind finding and printing all the images. We weren't concerned about our images having great quality since they'd only be viewed through a picture.
We then got a sheet of plywood, laid everything out and cut our openings. We decided to wallpaper the board using wrapping paper. It was a disaster! So in the end we actually just wrapped the board with the paper like you would a gift and taped it in the back. My wonderful, amazing, patient, talented husband (yes I'm sucking up here, he wasn't so thrilled about the whole thing) was kind enough to build the actual structure for us. He made the legs and did all the cutting. The legs are easily detached with two screws for easier storage. Then we just hung all the frames and it was photo shoot time! Here are some pictures of the actual structure.
(LOVE the crackle on this baby! We achieved this look with nothing other then Elmer's glue and craft paint. So proud!)
Cola was also our photographer. She did a great job but REALLY impressed me when it came time to edit. My son was being a pill and wouldn't cooperate. We only got one decent shot of him, but not to fear, Cola was able to take the best one of the rest of us and just photoshopped my son into the shot. Amazing, I know! I am now convinced that I have to learn Photoshop.
So there you have it, that is how I came to have the coolest Christmas cards on the face of the planet.
Now if you are thinking "wow that's cool but seems like a lot of work for a Christmas card" then you are absolutely correct. It was a lot of work. But we are going to advertise it and try to rent it out for parties. We can easily replace the background paper and images within the frames to fit any party theme, be it a wedding, office party, birthday bash, or school dance. We may even try to take it to the State Fair next year so people can get a jump on their Christmas cards. Who knows what will come of it, but the possibilities are endless.
Linking to THESE parties and events:


