Tuesday, March 20, 2012

A Basket Wreath

A tisket, a tasket, I made an Easter Basket!


 Isn't it fun?!

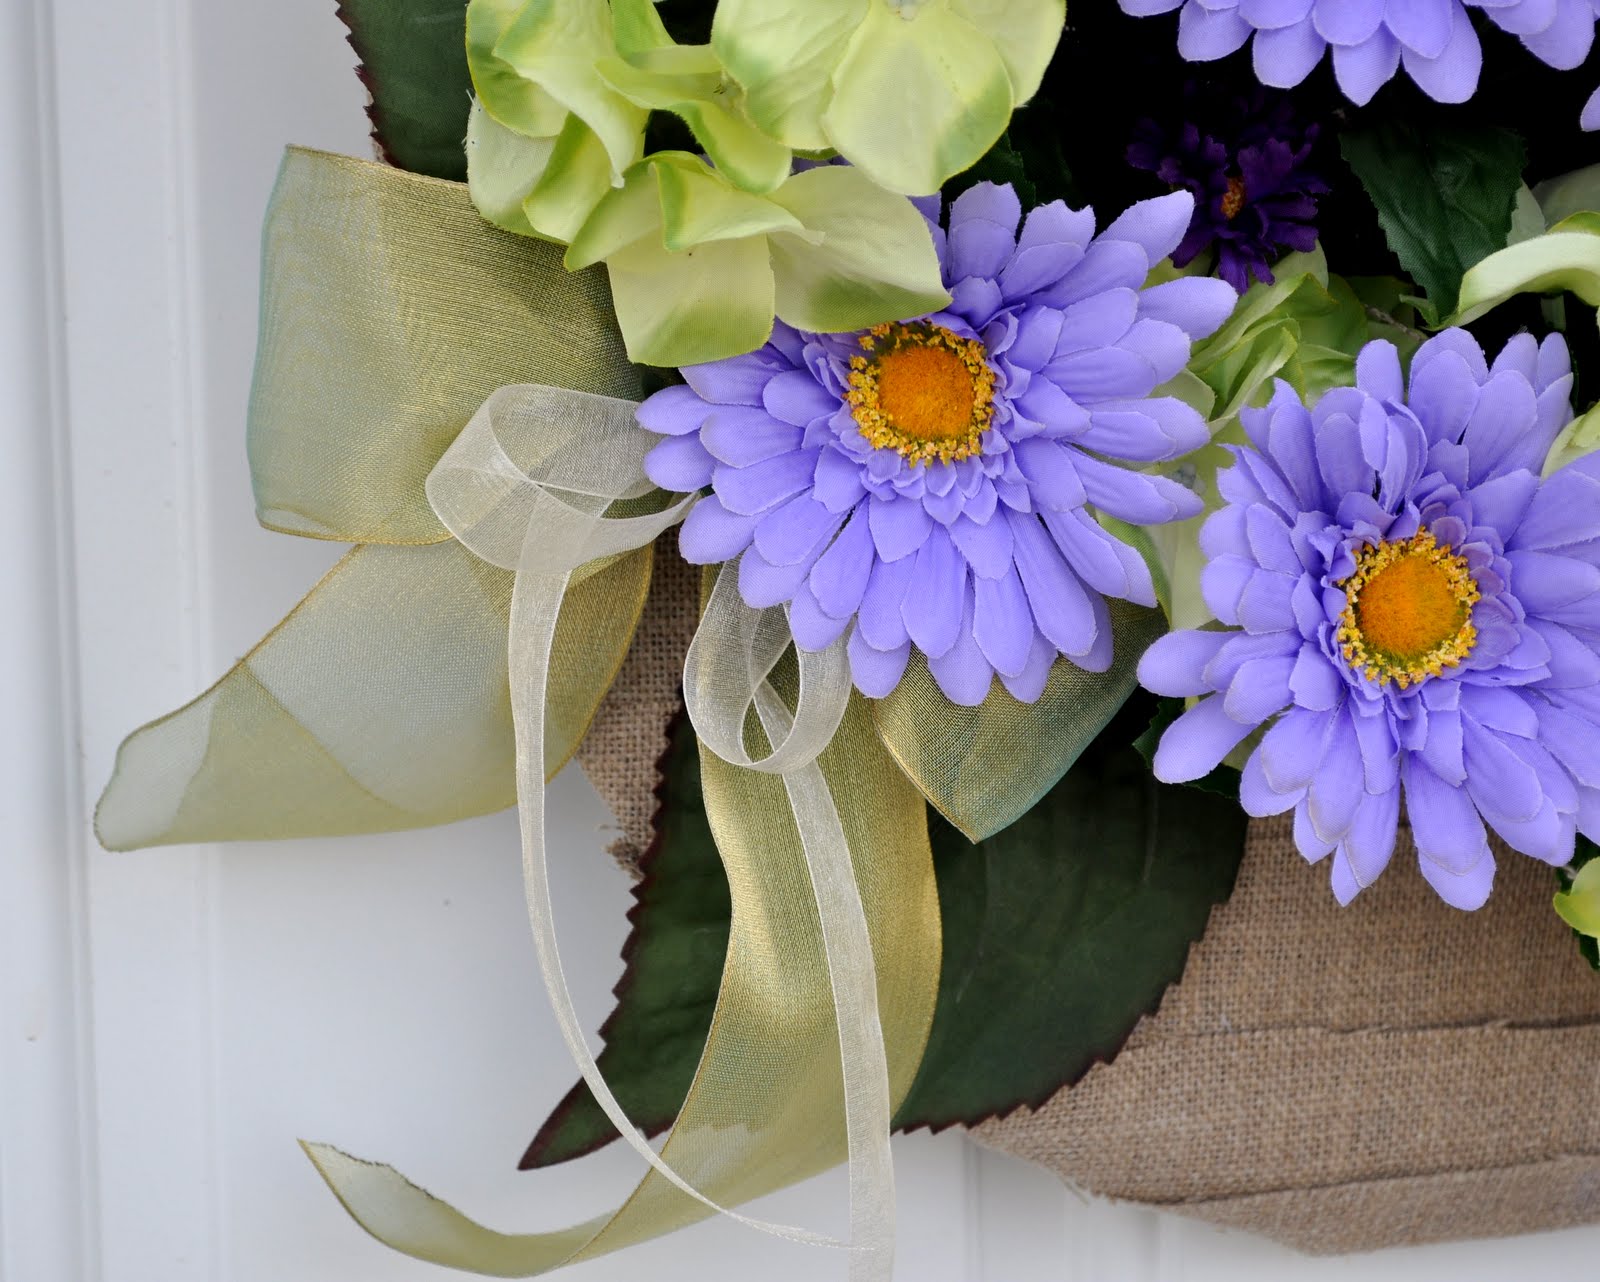
I wanted to make an Easter wreath that would last all spring.  I had in mind something that looked like a basket full of flowers.  So I had the idea of taking a wire wreath form and wrapping it in burlap to mimic the basket shape and adding a whole bunch of flowers.

I love how it turned out!


 I think it still has that Easter feel with the basket, but it'll look good until I get around to replacing it.  Love that!

The bow tucked into the corner is probably my favorite part.


The day I made this I met with a few friends from my neighborhood and we all made wreaths, but I forgot to bring my camera.  So I don't have picture instructions, but I'll do my best to describe the process.

You start out with a wire wreath form.... one kinda like this.


Then get some burlap ribbon or strips of burlap.  I couldn't find ribbon so I ended up getting some burlap fabric and cutting it into strips.  Start by wrapping half the form to make the handle of the basket.  Then take strips of burlap and wrap the burlap all the way across the front of the  frame and hot glue on the back.  Continue down the second half of the wreath to create the basket.


So now you have the basic basket.  You can now add your flowers and embellishments!  I just tucked the flowers into the different strips of burlap, hot-gluing and/or tying it to the back. 


I hope that made sense!

Anyway... It took me about an hour from start to finish and I love it! I hope you'll give it a try!


As always I'm linking to these great parties and events:

Tuesday, March 13, 2012

Baby Shower Invitations

So my little sister is having a baby in June... (I can't wait!!!) and I am co-hosting a baby shower for her at the end of this month.  Of course I made the invitation and they turned out so cute, I had to share!  The theme of our shower is going to be "Mommy to Bee" and we are going to decorate in pink, yellow, and black.  I think it will be really cute.

Here is how my invites turned out.


Aren't they cute!  I made the image using this digital kit by Faith True Originals.


I manipulated the red in the kit to make it a hot pink since we are expecting a little girl.  I think the bright pink, yellow, and black makes such a cute color combination.

I printed my images at Costco and then mounted them to pink card-stock using black photo-corners and a little bit of double sided tape.  The card-stock helps give the pictures some weight.

So anyway... that's it.  I'm in charge of all the decorations for the shower so I will show you what else I come up with as it happens.

Saturday, March 10, 2012

In case you missed it... Shamrock Silhouette

Have you all followed Wood You Like To Craft this week?  It was awesome!

All the projects were fantastic (as always) so be sure to check them all out.  Also, the silhouette linky party is now live and will go through next week.  So go link up any silhouette projects you have or are doing.  We'd love to see!

And in case you missed it, here is my post.

---------------------------------------------------------------------------------------------

Hello everyone!  Krystal from Sassy Sanctuary here today!  So are you in love with the silhouette bunnies Crafty Sisters made?  I am!  I totally am going to have to make some for Easter.  Silhouettes are such a fun theme and really about anything goes.  I'm excited to see what the other ladies came up with!

Any-who... for my silhouette project I decided to make a Shamrock.  It was such a fun and EASY project!  I love those kinds!  Ready to see?


Isn't it cute!  It actually inspired me to decorate a little vignette on the shelf-wall of my family room.  This is the first time that I have decorated this spot and I love how it looks!


To make your own shamrock silhouette all you need is an unfinished frame, a shamrock cut from 1" pine, some paint and some ribbon.

A shamrock would be an easy cut for a newbie with a jig saw or scroll saw... but I actually found mine already cut at a local scrapbook store for only $6.  Sometimes the short cuts are worth the time they save!

I painted the frame a dark grey and the shamrock green and Modge Podged some scrapbook paper to it.  Then I hot glued the shamrock to the frame and tied a big ole bow around the whole thing.


I LOVE the pattern of the green houndstooth!

Seriously, this was way easy... one afternoon from start to finish.

So that's it.  My simple shamrock silhouette!


Be sure to come back to see what Melinda and Wendy come up with!  They always make the cutest things so I'm sure they will be awesome!

As always I'm linking to these great parties and events:

Wednesday, March 07, 2012

It's WYLTC week!

It's Wood You Like to Craft week again!  Our theme this month is silhouette.  Crafty Sisters started us off with their A.D.O.R.A.B.L.E bunnies...


and I'm there today sharing a shamrock...


Melinda and Wendy are coming up later in the week.  It is always a ton of fun seeing what everyone comes up with so be sure to stop on by and check it out!

Friday, March 02, 2012

It's a double rainbow!!!!

OMG!  It's so intense!  A double rainbow!!!


What does this mean?!

Haha... you guys have all seen the Double Rainbow video right?  It is so funny!

Anyway, when I set out to do my mantle display for St. Patrick's Day I was actually inspired by Landee's cute rainbow display.  But I wanted to do it in a banner.  I made mine a double rainbow.  :)

It was simple.  I just cut the little flags out of card-stock and strung them up with some yarn.


I added my shamrock garden from last year and some greenery.


And the other side has some of the same stuff from my last two displays.


And that's it.  I love how happy it is.  Spring, please come quickly!!!

As always I'm linking to these great parties and events:

LinkWithin

Related Posts with Thumbnails
Don't stop there! Click "older posts" to keep reading!