Showing posts with label modge podge. Show all posts

Sunday, January 27, 2013

Nursery Decor- sneak peek

So I am almost done with Jonah's nursery.  There are two more things I plan to add before I share the whole reveal, but as a little teaser I thought I'd share a couple things I made recently for the room.

First, my neighborhood group got together for a craft night the other day.  One of my neighbors had picked up a 9 opening shadow box frame for us all to do.  I have to admit it took me awhile to decide what to do with it!  But I decided to take it and make a "stats frame" for Jonah.  It turned out super cute!


It started out blank like this... (except not painted)


I then got super lucky and found these wood tiles from Micheal's that fit into each square perfectly.  I love it when things work out like that!


Then I went and found some cute scrapbook paper and printed some sepia newborn pictures of Jonah.  I modge podged the scrapbook paper and pictures on some of the tiles and used vinyl to make a stencil and painted the "stats" on the others.  (Tip:  if you have your pictures printed using a laser printer then you can modge podge without them bleeding. I had mine printed at office max.)


Then you can arrange your tiles.  I ended up using clear silicon to glue each tile in place.


Hang and enjoy!


------------------------------------------------------------

I also made Jonah his letters.  I found the wood letters at a local craft store and modge podged more cute paper to them.  (There has been lots of modge podge lately...)


They look so cute on his shelves!


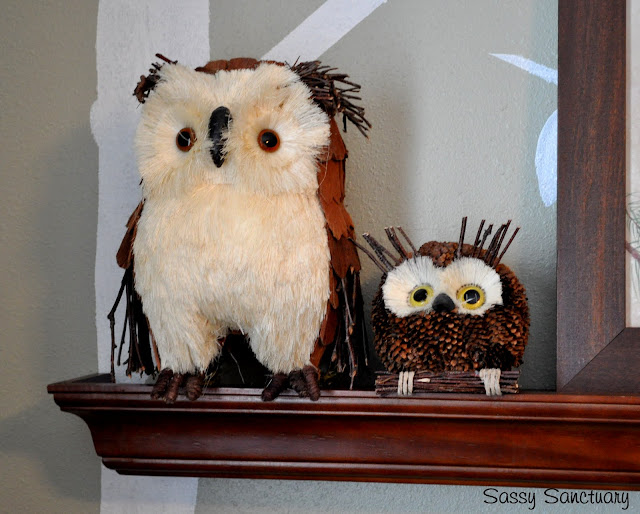
And speaking of cute things on his shelves... aren't these woodland creatures the cutest?!  We found them at Pier1 Imports awhile back.  Love them!


Anyway, that's it for now.  The whole nursery reveal will be coming soon!


As always I'm linking to these great parties and events:

Monday, November 01, 2010

Reversible Bunting Banner

Okay guys, I finally jumped on the bunting banner wagon and made myself an adorable trick-or-treat banner. 


Isn't it fun?! Now I know what your thinking, your thinking "uhh, Krystal, Halloween was yesterday so we really don't care about your trick-or-treat banner.  Yeah its cute, but that information would have been nice LAST WEEK!" Well, never fear.....this banner is reversible!


I love it so much! I'm over here doing the happy dance because I am REALLY proud of myself on this one! Its not your typical bunting either.  I wanted to make something with some substance that would hold up and use materials I felt comfortable working with.  That's why the typical paper (to weak) and fabric (I'm just not that talented of a seamstress) banner was out.  So this one is made with craft foam and scrapbook paper.
Do you want to see how its done? Okay fine, you twisted my arm.


Step 1: Prep.  Cut out 11 triangles from your craft foam.  I used 2 sheets of black.  I recommend making a pattern out of paper.  Cut out 11 more slightly smaller ones from various Halloween papers and 11 from various Fall/ Thanksgiving papers. Also cut out paper letters to say "TRICK or TREAT" and "GIVE THANKS" (see image A)  Note: the "or" will be on one pennant and there will be one blank pennant between give and thanks.

Step 2: Make an assembly line and modge podge a paper onto the foam.  Pick one side first and just go with it.  You can immediately add the letter and then set aside to dry.  (see images B and C)  When you set them aside, line them up as they would appear when hung.  This will keep you from getting confused. (see image D)

Step 3: Once that side is dry, you can begin the other side.  Repeat the same process but remember the first letter will be on the last pennant of the side you just finished.  So work from the back to the front. (See image E)

Step 4: Once everything is dry, take a hole punch and punch a hole into each top corner. (see image F) Then take a piece of ribbon about 6 inches long, thread thru the hole and tie a knot.  I trimmed the ribbon and seared the edge with a lighter to give it a finished look. (see image G) Then add a pennant to the ribbon and tie a second knot as far apart as you want your pennant. Finish that edge like you did before. (see images H and I)  You want to be sure that your knots all end up on the same side of the banner.  I did them on the "give thanks" side, but it doesn't really matter as long as you are consistent.  (see image J)  Do this for all the pennants leaving extra ribbon at the ends to hang with.  Enjoy!

Now, if you want to make a Thanksgiving and Christmas banner instead, you can still do "give thanks" on one side and "Christmas" on the other with the first and last pennant being blank...OR...wait for it..... the Christmas side can say "Let it Snow."  I know, I'm good.

Now for some more pictures of my adorable two-sided banner!
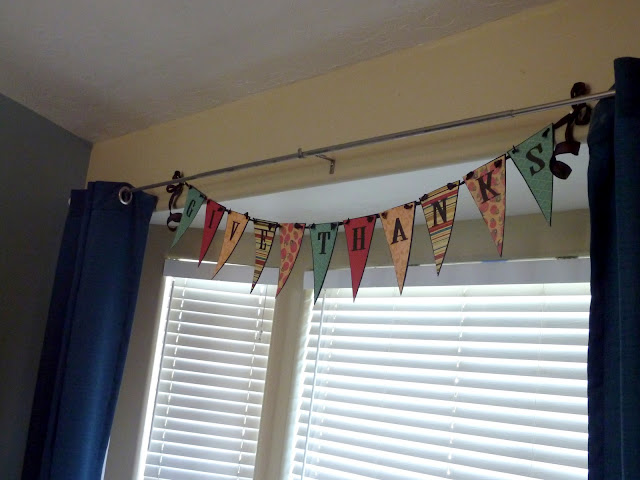


Now go make one! And if you do a Thanksgiving/Christmas one, promise to send me a link.  I'm dying to see one done!

I'm linking to these weekly parties and these events.

Sawdust and Paper Scraps
 

Creations by Kara

Monday, October 04, 2010

2x4 Pumpkins

So I was asked to come up with a project for the ladies at my church to do at an activity.  I was told to come up with something that would take 1-1 1/2 hours to make, and cost under $10.  Yikes! Pretty restrictive.  This is the first time I've been asked to come up with the craft and since its sorta my thing, I wanted to make something good.  So 2x4 pumpkins it was, cheap and easy yet super cute.  But of course I had to put my twist on them. Here is my version of the 2x4 pumpkin.


Pretty cute right? I love the pattern added with the scrapbook paper and the big bow.  I also found some paper cover floral wire and added curlies to the bow.  They remind me of the vines pumpkins sometimes have.  I also angled the corners so that the pumpkins would be a little more round.

Here are my two cents on making a 2x4 pumpkin.

Buy a 2x4.  They cost about $2 and you can get two pumpkins out of one.  I had my husband cut them down for me.  The short pumpkin has five 10 inch pieces and a 3 inch piece for the stem.  The short one has six 8 inch pieces and a 3 inch stem piece.  Cut the angles on two of the pieces per pumpkin.


Paint them orange (or brown for the stem) and then get out your palm sander and rough up all the edges.  You can do this by hand too. 


Apply a light coat of stain all over.  This is optional but it tones down the orange and I like the look. Then use modge podge to apply the strips of scrapbook paper.


Hot glue all the pieces together and top with a cute bow.  I made my bow by making two simple bows  and attaching them together and added a curly out of floral wire. And that's it, easy peasy!

Here are a few up close and personal pics of each of the pumpkins.


So what do you think?  I hope all the ladies in my ward like them and we'll have fun making them.  I'll show off pics of all the different combinations after we do them. 

Thanks for reading!

I will be linking to these weekly parties and these special event parties.


SYS Thurs
Get Your Craft On Tuesday

LinkWithin

Related Posts with Thumbnails
Don't stop there! Click "older posts" to keep reading!