Thursday, December 29, 2011

Oh My Crafts Vinyl: Product Review

Disclosure:  I was sent free product from Oh My Crafts in exchange for a review, but all opinions are my own.

I'm so excited to tell you guys about Oh My Crafts!  OMC is a great website full of crafts supplies.  They carry everything from paper to craft cutters to home decor.  Well, about a month ago they offered to send me some vinyl to review.  I couldn't say yes fast enough!

I love crafting with vinyl because there is so much you can do with it!  When my package came in the mail it was like an early Christmas morning.  They have such fun colors and even some specialty vinyl, like glitter and chalkboard.  Right off the bat I could tell that OMC vinyl felt thicker then other vinyl I have used.  It came in 12 x 24 sheets and was nicely packaged without any bends or creases.  I have used rolls of vinyl in the past and have often had air bubbles in the vinyl that has caused problems during cutting, but not the case here!

I wanted to give this stuff a good test run so I decided to use it in the 3 ways I most often use vinyl...while crafting, on the wall, and as a stencil.

The first project I used it in was my Christmas Quote Tree.  (You can read more about it HERE)


I was actually having a series of problems with this project when my OMC package came in the mail.  It was a God send!  When I sent the vinyl through my silhouette machine I was impressed with how clean it cut.  Often times with other vinyl I will have parts lift while its cutting, but this stuff stayed in place really well.  I also noticed it was easier to weed out the negative area for the same reason.  And it stuck like a dream!

For my next test I wanted to try it on a wall.  I really like using vinyl on a wall in theory.  I love that it is removable without damaging walls but I've actually never had much luck with it.  I've tried several brands and I've always had trouble getting my vinyl to stick without bubbling or lifting over time.  So for me, this was a big test.

I decided to do a cute little princess saying for my daughters room.


I decided on "Little Miss Princess" because we call our daughter "little miss" all the time.  I designed the text using the Silhouette software and got the crown from the Silhouette store.  Once again, the vinyl cut beautifully.  I used transfer tape with this application.  I avoid transfer tape whenever possible because I have a hard time with it, but this stuff didn't feel overly sticky so I was hopeful that it would let go again.  I still had a bit of trouble getting the vinyl off the tape and onto the wall, but nothing terrible.  It was defiantly better then other transfer tape Ive used.  And once the vinyl was off the tape and onto the wall, it stuck!  Not a single bubble or spot that has lifted.  I'm so pleased!

For my final test, I wanted to see how it did as a stencil.  This is actually what I do most often with vinyl.  I have been on a bit of a sign kick lately and I love the look of painted lettering that is distressed, so making a stencil is the way to go.  I found a great quote and made this sign for my new house.


I love how it turned out!  We are in a transition period right now and this great quote will remind us that life is what we make it. 

One of the things I love about the OMC vinyl is that it has a grid on the back.  This is really helpful when making a stencil because you can cut the stencil out straight. And a straight stencil is so much easier to get on correctly!  Once again this stuff stuck really well to my board.  I did have a little bit of bleeding under the vinyl but very little.  Because this stuff sticks so well it was a bit harder to remove the stencil then with other stuff I've used.  It just came off in pieces.  Not a big deal.

Overall I am REALLY impressed with the quality of OMC vinyl!  (and doubt I will ever buy vinyl from anywhere else again!) I'm sure you will hear a lot more about them in the future.  I can't wait to try out some chalkboard vinyl and to use the glitter vinyl!

Do you want to try some too?  Oh My Crafts has created the discount code OMCBLOG10 for 10% off your entire order!  They have great prices and awesome colors so be sure to check them out!  You'll be glad you did.  :)

Saturday, December 24, 2011

Progress Report- Moving In

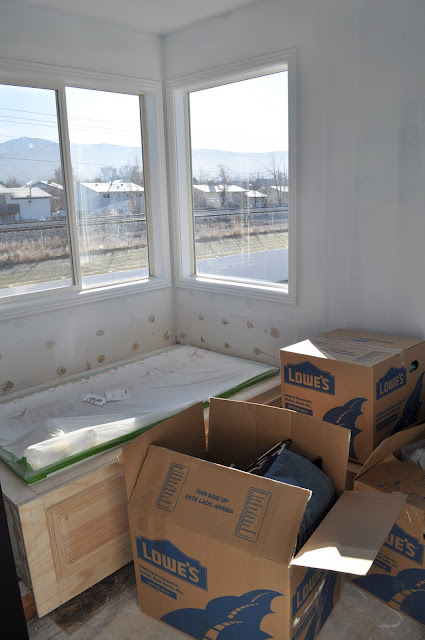
I'm so excited to show you guys all the work we have done on our new house!  We finally got all the major construction done and are moved in.  I haven't hung a single thing on the walls yet, or installed blinds, and we have a long list of odds and ends to finish, but most the boxes are unpacked, the Christmas tree is up and its great to be living under the same roof again!

If you want to see what it looked like before, you can check out THIS post.

Here is the front room as it looks at this point.


I'm loving how the board and batten turned out and it adds so much to the space!  The walls are painted "amazing grey" by Sherwin Williams and its a nice grayish beige color. (its actually the color throughout all the main rooms of the house)  It looks great with all the grey and blues I have going on in the house but is still warm enough to go with the browns too.  All the trim and ceiling in the whole house are a true bright white.

Aren't the floors nice?  They are a laminate floor that we got from Sam's Club.  Its a click-in place product  that floats on the sub floor.  It was easy to install, had the backing already on it, and only cost $1.50 a square foot.  Amazing!  We love it!

I was sure my kitchen table wasn't going to fit in this house, but its actually perfect.


Although the placement of the light fixture is going to have to move..... eventually.

The downstairs family room is coming along really well.


I'm in LOVE with my media wall!  I've started decorating the shelves but I have a long way to go.  Its going to be so fun to have all that space to make pretty.  This room is already the main hang out space for our family and I love the cozy feel.

The upstairs hallway looks pretty awesome too.


We painted all the doors in the whole house black.  With the white trim and white board and batten, its a pretty neat look.  It really made the cheap doors look more high end.

My son's room....


Is pretty much the same as it was in my old house.  The wall color in here is "Grassland" by Sherwin Williams.  Its the prettiest soft green.   I picked it because it looks great with the stuff going on in my son's room now, but will also be a great nursery color when the time comes to move him downstairs and add to our family.

My daughters room....


Is also basically a recreation of her room at our old house.  The only difference here is instead of the faux panel walls we used actual molding to panel one wall.  Its crazy how such a simple treatment adds so much to the look of her room.  The wall color in here is a lot softer pink too.  It's "Charming Pink" by Sherwin Williams.

And here is my bedroom.


Its definitely a work in progress but I see so much potential!  I love the wall color in here.  Its called "Silver Strand" also by Sherwin Williams and is the prettiest, soft, blue-grey color.  I totally love the color and I'm super excited to do some new things in here.

The only room in the house we didn't totally gut was the kids bathroom.  We do plan on re-doing it in the future, but it works for now.  Its a good thing we left it in tack too because the master bathroom still looks like this.


We decided it was best to get all moved and then we can work on the bathroom over the next month or so.  But that means that my family of four is all sharing this tiny space.


It works.  Its just small.

Now you may have noticed that there is one room I've not shown you...

My kitchen!
All that is left in there is tiling the back-splash and it has turned out so good and is such a transformation that I want to wait to show you in a big reveal.  It'll be worth the wait though.  Promise.

Here is a little peek to wet your appetite though.


It's a dream.  I can't wait to show you!

I hope you all have a very MERRY Christmas!

Friday, December 23, 2011

Christmas Tree Bible Quote

 Sorry about the long absence people!  We finally got moved into our new house and are somewhat settled.  Man, I forgot how much work moving is!  The hardest part for me though was we had trouble with our phone lines and it took forever to get a technician out to fix it so I could get my Internet working.  I was 17 days without Internet access.  I have felt so disconnected from the world!  It sure feels good to be back!

Anyway, a couple weeks ago was WYLTC and I wanted to share my project with you in-case you missed it over there.  The theme this month was Christmas (of course!) and everyone made some super cute stuff.  So be sure to check them all out.

I'll be back tomorrow with a progress report on our house at this point.  Although there is still a ton to do, we have come SO far!

--------------------------------------------------------------------------

Hello!  Krystal from Sassy Sanctuary here.  Isn't Melinda's Christmas tree stand adorable?!  What a fun alternative to a tree skirt.  Unfortunately, just like last month, I am in the process of moving and don't have access to any of my power tools.  I don't have a tree yet either, so a tree stand was out for me.  Bummer, cause its SO cute!

(Before you feel too bad for me though, we are moving TODAY so things are finally going to start to settle down!  Hooray!)

So instead of a tree stand I just thought about Christmas Trees in general. (that works right!?) I went to the craft store and found a frame that had a 12x12 opening and decided to make one of those cute signs that uses a quote as the shape of the tree.... you know.... like this!


Now, I have to confess that this was one of those projects were everything went wrong!  First I painted the frame and the board inside the frame the same grey color, used vinyl to make a stencil for the text and antiqued the heck out of it.  It was cute but the colors I used were so similar that it was hard to tell what it was from a distance.  I hated it.

So I redid the inside of the frame only (the outside stayed) in a cream color and used a bolder color pallet to paint on the text.  This time though, for some reason when I pulled up the vinyl stencil it took half the paint with it.  It was a disaster!

Then miracle of miracles, I got a fun package in the mail from Oh My Crafts later that very day.  They sent me some vinyl to review  (more on that later!) and they had a ton of colors.  So I decided to give this poor sign one more shot.  This time I painted the inside of the frame a light grey color, I added some "birchwood" texture inspired by my friend Sarah (although mine turned out more like a snow storm) and then just cut the text from the vinyl.  

I worked like a dream! (the OMC vinyl is amazing!)

I love how it turned out and I LOVE the bible verse to remind me what Christmas is really all about.  And it looks great with the rest of my mantle decor!


The outside of the frame turned out super cute too with the little stencil I put on the corners.  I'm thinking once Christmas is over I will reuse the frame with something else.


Anyway... I thought it would be fun to share the file I used to make the tree.  So if any of you are silhouette users, you can click HERE and download the file to cut a bible verse tree of your very own. 
Personal Use Only Please!

(let me know if that link works since I've never shared files that way before.)


I hope you all have a very merry Christmas!


As always I'm linking to these great parties and events:

Monday, December 12, 2011

WYLTC and other news....

Just wanted to give you guys a head up that its Wood You Like To Craft week again!  Be sure to head on over and see all the cute Christmas crafts! 

And in other news, TODAY is the big move!!!  I'm so excited to show you guys all the progress we have made on the new house!  So wish us luck and hopefully I'll be back in a few days with lots to share!


Sunday, December 11, 2011

Snowman Ornament- Kids Craft

I was asked to come up with a Christmas kids craft to do with my son's kindergarten class last week.  So I hit up pinterest and was inspired by all the cute popsicle stick ornaments.  Turns out you can make anything from a Santa to a Christmas Tree to an Angel out of a popsicle stick!  I decide to make Snowmen since they looked like they would be simple and I was dealing with 15 kindergarteners.  :)

All you do is have the kids paint a popsicle stick white with craft paint. Tell them to be careful not use too much paint so it will dry quick.  Then they can glue (regular white glue) buttons down the front of it.  I had pre-cut little hats from black foam and the kids stuck those on with foam tape. (once the paint had dried) The scarf is made from a pipe cleaner and the kids all drew faces on with markers.  Once done, I hot glued a loop of yarn to the back so they could hang them on the tree.  They all turned out super cute and all 15 kids had their snowman made in about 30 minutes.

Here is how they looked.


Cute!

They were a blast to make with the kiddos.  :)
Thanks pinterest!

(you can find the original inspiration for these HERE)


As always I'm linking to these great parties and events:

Wednesday, December 07, 2011

Reversible Table Runner

I actually made this a few weeks ago but haven't had time to write about it.  Even though fall is over, its still a cool idea.

Anyway, I have the most adorable table runner from Silly Mama Quilts that looks so cute with my spring and summer decor.  But I needed a fall runner.  I also knew that almost as soon as I got a fall runner made I'd need a winter one too.  So I decided to kill two birds with one stone and make a reversible runner.  I love it!


I had so much fun picking out the different fabrics.  I bought 4 fat quarters for each side and have enough left that I could easily make a couple more.


This was my first EVER quilting experience so I'm super proud!  It's far from perfect (aka straight) but I love it and how it looks with the rest of my seasonal decor!


Here is how I did it if you'd like to make one of your own.


Step 1:  Gather your fabric.  Like I said I used 4 fat quarters for each side with TONS left over.  I decided how wide I wanted my runner (cut it about an inch wider to make room for seams) and then just vary the size of your pieces. (image a)

Step 2:  Using the first side as a guide, cut your second side so that its the same size.  (image b)

Step 3:  Then start piecing your sides together.  Just lay right sides together, stitch, and then continue. (image c) Once you have both sides done be sure to iron all your seams really well.

Step 4:  I basically made mine like you would a big pillow.  I put right sides together and then a piece of quilters batting below it.  Then sew all around the edges leaving an opening to turn it. (image e)

Step 5:  Once you have it turned, hand stitch the opening close and then press really well again.  Then you can finish it by sewing a top stitch all around the runner and doing wavy lines down the body of the runner.  (image f)

I just used a regular sewing machine for this with a regular foot.  It was really quite easy and came together pretty quick.  A great project for a first time quilter! 


You should give one a try.  :)

New Winners

So a couple people never claimed their prizes from our giveaway event and since I have no way to get a hold of them I'm going to redraw.

The new winner of the charm necklace OR two pairs of earring from The Bird's Papaya is....  deserae who said... "I heart the BP on Etsy!"

And the new winner of the blog design by me goes to... Tutuland  who said... "I would like to change my blog and add more buttons and give it a new life... I feel like my current blog is not me."

Congrats you two! 

Monday, December 05, 2011

Winners Winners Winners!!!

Thank you all so much for participating in My True Love Gave To Me Giveaway Event!  It was so much fun introducing you to my friends and some of my favorite shops.  I hope you all enjoyed it and got some Christmas shopping done too.  And a special thanks to all the vendors for their generosity.  you guys are the best!

So, without farther ado.... here are the winners!  (you have 48 hrs to contact me and I'll get you in touch with your prize vendor.  If I don't hear from you I will redraw winners on Wednesday.)

The winner of the charm necklace OR two pairs of earring from The Bird's Papaya is....  Sally who said "I "Heart" Papaya on Etsy!" 

The winner of the family picture holder from Sweet Pickles Designs is...   Christy who said "I love the BELIEVE wood letters! They need to be on my mantle."

The winner of the $25 credit and 40% off purchases to Never Nola goes to....  Cerrisse who said "I added her shop to my etsy favorites."

The winner of the cute purse from Zoli's Boutique is...  Cecily who said "I liked them and told them you sent me!"

The winner of either the the "North Pole" pillow or the reversible "Tonight/ Not Tonight" pillow from Monmell Designs goes to...  CarlyAN who said... "That rooster is rad! Haha, LOVE him!"

The winner of Charming Cozy Creations printed party package OR the $50 credit goes to... DesperateAngel16 who said "I like the Christmas Jolly cards"

The winner of a $25 credit to Weeperas goes to...  Jen S. who said "I am a follower of Weepereas Blog"

The winner of the $20 credit to Silly Mama Quilts is....  Mom2RyandSis who said "I like Silly Mama on FB!!"

The winner of a craft night for 5 from Well Good is...  annemarie who said... "Love the snowman blockhead kit."

 And the winner of the blog design by me goes to.... Cass and Hailey Ross said..."Blogging is my absolute favorite, but my page needs a new look! I would LOVE LOVE LOVE something new. I would be so happy to win. :)"

Congrats everyone!!!!


Thursday, December 01, 2011

My True Love Gave To Me- A Blog Design

I hope everyone has had a great time with our My True Love Gave To Me- A Giveaway Event!  I just love each and every shop that I featured today and hope you love them as much as I do.  I wish you all a ton of luck and I really wish I would pass out a prize to each of you!  Winners will be announced on Monday so be sure to check back!

If you missed a giveaway, you can see them all by clicking HERE or on the button in the sidebar.

But I do have one last giveaway.  I can't do a giveaway event on my blog without giving something away from me too!  So I'm going to give one of you a "Basic" blog makeover!


My basic package will include a header, background, menu bar, blog button, up to 10 sidebar titles, and a signature.  It will also include the cost of the digital kit we use.

You can check out my website if you need any more information or are interested in a blog design.  I love each and every blog I have ever designed and I have worked with the best people.  Here are a few recent ones that I have done to give you a sample of my work.


--You must be a follower of Sassy Sanctuary to enter and this giveaway is for Blogger Blogs only--

To enter, just leave me a comment telling me why you'd LOVE a blog design.  

Extra Entries
(leave me a comment for each one that you do)

Tell all your FB friends about this "My True Love Gave To Me" Giveaway Event.
and/or
Blog about this event.  You can use the button on the sidebar if you want.


I wish you all the best of luck and a very merry Christmas season!  Happy Shopping!

My True Love Gave To Me- Well Good

I'm sure all of you know the super talented Wendy from Craft Goodies (and if you don't, you should!) but did you know she has as etsy shop?


At Wendy's shop Well Good you'll find super cute craft kits.  This is perfect for anyone who enjoys crafting but doesn't have the power tools needed or wants to order a bunch of kits for a craft group.

She does a "Word of the Month" that is always adorable....


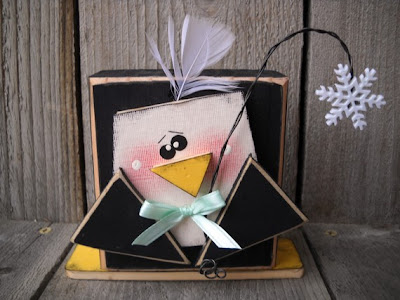
And she always has the cutest "block heads" for every season.  Here are a few of my favorite blockheads from past seasons.


And of course other craft kits as well.


Isn't she so incredibly talented?  And she makes it so easy to have all this cuteness right in your own home!

So are you ready to have a ton of fun?  Because Wendy is giving one of you a Winter's Craft Night!  That means that one of you will get 5 unfinished blockhead kits in your choice of Santa, Penguin, or Snowman!  All that's left to do is invite some friends over and have a fun filled craft night! 
(Or you could finish them yourself and give them away as gifts I suppose, but a craft night sounds way more fun! )


How will you ever choose?!
--You must be a follower of Sassy Sanctuary to enter and due to shipping this giveaway is only open to residents of the US--

MANDATORY ENTRY

Visit Well Good on Etsy, look around and leave me a comment telling me your favorite item.

EXTRA ENTRIES
(leave a comment for each one)

Be a follower of Craft Goodies
"Like" Craft Goodies on FB
and/ or
"Heart" Well Good Etsy Shop

But that's not ALL!!

Wendy is so super nice that she has decided (this weekend only)  that if you mention sassy sanctuary in the notes to buyer on any purchase $5 or more, she will throw in a FREE reindeer blockhead kit!  Offer is only good through 12/5/11 so don't wait!

Good Luck!

LinkWithin

Related Posts with Thumbnails
Don't stop there! Click "older posts" to keep reading!