Showing posts with label printables. Show all posts

Saturday, June 01, 2013

DHD Blog Hop- June House Party and Summer Bucket List

Hello everyone and welcome back to Sassy Sanctuary!

It's June and that means it time for another Design House Digital house party and blog hop!  This month the theme is "whimsy" and you'll find that this collection is super cute, super bright, and perfect for summer!!


 You can check out and download the kits HERE
 The house party kits will be on sale, 30% off, through June 5th.

Here are a couple of the layouts I created using the house party kits.

In this first one I used a couple pictures of my kiddos from last summer enjoying some snow-cones.   We actually avoid food coloring around here so snow-cones are a rare treat for my kids, but they LOVE them!  I think the happy kit colors compliment my happy kids really well!


We recently celebrated the first birthday of my cute little niece Kendal, so I had to make a page for her with these kits too!  The fun colors worked really well with her birthday celebration pictures!  And I love how this layout turned out!


But you know me!  I just LOVE printables and hybrid projects so I had to make a printable too!

The whimsy kits really had me thinking about summer and with school just getting out it was the perfect time to create our Summer Bucket List!  If you are anything like me, you always have a ton of things you want to do while the kids are home, but half of them never get done because you just don't think about it.  This way when the kids say "I'm bored!" you can consult the list and find something to do!

So I made my print, put it in a cheap $5 frame from Micheal's, hot glued magnets to the back, and stuck it to the fridge.  By putting it in a frame I have an instant dry erase board.  Then we brainstormed as a family what we wanted to do this summer and wrote out our list on the glass with a dry erase marker.  We can cross them off as we get them done, and if we finish our list we can erase it and make a new one!


And the best part is that my kids are SO excited about it!  They keep asking me when we are going to go do all these fun things. So cute!

So if you'd like to make a summer bucket list of your own, here is the print!


PERSONAL USE ONLY


Just save the image (click to get the full image and not the thumbnail, right click, and then hit "save") and print it as an 8x10.  You can add it to a frame to make it dry erase like I did, or you can just write on it and call it good.  Either way, you're sure to have a super fun summer if you take the time to make a game plan!
 
I hope you'll enjoy this month's house party kits and create some fun scrapbook layouts and enjoy your summer bucket list.  Once again, HERE is where you can find the kits to play along with us!

If you are new to digital scrapbooking and would like to give it a try, I use and LOVE the software Scrapbook Max.  You can download a free trial and see what you think.  Its super easy to use and I know you will love it!  DHD also has a newbie page in the works.  It is chuck full of all the information and tutorials you need to get started.  So watch for that as its coming SOON! But I have to warn you, once you go ditgital, you'll never go back!!! 

And that's it!  You made it to the end of the hop!  I sure hope you enjoyed it and are inspired to digi-create!  If you found your way here first, hop on over to DHD to go to the start of the hop so you don't miss a thing.

Or here are all the stops.
  1. Design House Digital
  2. Tasha Lanigan Creates
  3. Inkling and Wit
  4. To Be Remembered Scrapbooks by Melissa Marti
  5. Hoffmann CreaTIAns
  6. Ratty Tattys Blog
  7. Chers Flair
  8. Jen Dipzinski Design
  9. JJ Designs
  10. Sassy Sanctuary

Thanks for reading!

As always I'm linking to these great parties and events:

Wednesday, May 01, 2013

DHD Blog Hop- Inspiration and a free printable!

Hello Everyone!

Welcome to Sassy Sanctuary!  I'm super excited to be a part of today's blog/facebook hop and to share a little scrap-booking inspiration using this months oh so cute house party kits!

This months color scheme is titled "romantic"  and it is a beautiful, soft pallet perfect for your little girls or lovey dovey photos of you and your loved ones!

 
You can check out and download the kits HERE.
The house party kits will be on sale, 30% off, through May 5th.

So... what do you do with these lovely kits?  Well... make beautiful scrapbook layouts of course!

This first layout is of my sweet little Ava.  These are the pictures from her Easter photo shoot.  I just love these pictures and love how the kits colors really complement them and leave a very pretty, soft overall feel.


And with the romantic theme in mind I went and found a few photos of me and my honey.  These are pictures of us at our wedding, one from a few years ago, and one from sometime in between.  Its fun to see how we have grown and aged together.     The romantic kits have everything you need to tell your own love story.  Aww!

(Come visit my DHD gallery to see exactly which kits I used for these layouts.)

BUT, I've said it before, as much as I love digital scrapping, my true love is digital printables!  So with Mother's Day just around the corner (at least in the US)  I thought I'd use the house party kits to make you guys a free printable.  Mothers Day Cupcake Toppers!


Aren't they sweet!  What a perfect addition to any Mother's Day Celebration!  (And what Momma doesn't like cupcakes?!?  I know this one does!!)

Here is your printable.  Just save the image (click to get the full image and not the thumbnail) and print it as a "full page." I like to use card-stock to give them some weight.

(FOR PERSONAL USE ONLY)

They are created to be used with a 2" punch.  I have both a circle and a flower punch and love them for cupcake toppers.  The punches I use are EK punches.  You can get them at Joann's (be sure to print a 40% off coupon!) and they are great because they have a deep reach and you can see what you are punching!


Then all you have to do is tape a tooth pick to the back and stick them in your cupcakes!


And if you REALLY want to wow your mom, you can make matching wrappers too!  All you do is pick out some matching papers from the kits and print them.  Then print the template and cut out the shapes.  The template is going to make them a little on the big side, so if you have smaller cupcakes (like I did) you may have to trim them down a bit.  I ended up taking about 1/4" from all sides to get mine to fit right.  Just take a little off at a time until you get them to fit your particular cupcake.


They are basically little sleeves that your cupcakes sit in.  But they sure make the cupcakes look special!

Here is the template for them.  Once again, click to view the full image, save it, and print it "full page."


And HERE is the link again so you can go pick up a paper pack to match the toppers.

I hope you'll enjoy this month's house party kits and create some lovely scrapbook layouts and make your Momma a special Mother's Day cupcake!

And if you do craft with us using the house party kits we want to see!  Please post your cards, layouts, and crafts in our color swatch challenge so we all can share in the inspiration!

If you are new to digital scrapbooking and would like to give it a try, I use and LOVE the software Scrapbook Max.  You can download a free trial and see what you think.  Its super easy to use and I know you will love it!  But I have to warn you, once you go ditgital, you'll never go back!!!

You can follow the rest of the DHD blog/fb hop by going here


(Sorry about the "pin it" app.  Just be sure to click the arrow where the pin it button doesn't appear)

Tuesday, April 17, 2012

Ba'bee' Shower Week- the games! (free printables)

Now... the best part of a baby showers is the games right? ;)

We had a lot of fun planning the games and prizes for this shower.  We played 3 games.  The first one was baby shower Pictionary.  We had a dry erase board and split into two teams.  We played so that everyone had a chance to draw once and then counted up the score.  The winning team each got a "Burt's Bees" chap-stick.

It was a fun game with words like "breast pump" and "epidural." hehe

You can download the complete wordlist HERE.

Next we played "The Price is Right"

We had a basket of baby items and gave each guest a card with a list of everything in the basket.  They got to guess how much each item cost.  Whoever got closest, without going over, won a gift basket with more "Burt's Bees" products.


Here is the cards we used for this game.  (I have one with the list of what was in our basket, and a blank one if you want to add your own items.)


 And the final game we played was bingo. This version of bingo is actually something to keep the guests involved while the mommy-to-be is opening all her gifts.  I made blank cards and let everyone fill their own card out with items they thought the mommy was going to get.  Then as my sister opened her gifts they got to mark them off.  We played "black out" to make it more challenging and ended up having to just go with whoever got the most crossed off at the end.  Another variation would be to play double lines, or have the guests pass their cards around after filling them out.  The winner also got a "Burt's Bees" gift basket.

Anyway, here are the bingo cards.


 To use the game cards just click on the image to view it larger, then right click and save to your computer.  Enjoy!!

(Please be a public follower of Sassy Sanctuary before using)

And that was it!  We really had a lot of fun!

As always I'm linking to these great parties and events:

Monday, April 16, 2012

Ba'bee' Shower Week!- the decor and banner printable

Hey everyone!  I'm so excited! It is baby shower week!  As most of you know I helped throw a baby shower for my little sister a few weeks ago.  We went with a "mommy to bee" theme and it was a blast to decorate and plan around.  I'm going to spend the week sharing what I did and I have a bunch of free printable for you.  :)  (you can see how I did the invitations for the party HERE)

First up... the decor! 

We didn't go too over the top decorating, but we did a couple vignettes.  The first was the buffet table.


We found most of our party supplies at Zurchers.  We went with a yellow table cloth, black and white polka napkins, and black utensils.


The plates were pink. (this party was for a baby girl.  you could use a blue accent with the yellow and black and it would be just as cute.) The cups yellow, and we also had bee napkins.


The centerpiece was the diaper cake (tutorial to come) and a balloon bouquet.


We had a local bakery make cupcakes with bees on it for us.  They didn't turn out exactly as I had imagined, but they were cute.... and really yummy!

Then on the other side of the room I had the gift table.


 I hung the "mommy to bee" banner across the mantle and flanked it with two more balloon bouquets.


The banner was made using this digital kit by  Faith True Originals.  A big thanks to her for making such cute digital kits!

I printed the banner at office max on card stock.  I had the images printed at 5x7 and then cute each one down to 5x5.  They have such good printers the quality was way better then I could have gotten at home.
I then punched holes in each corner and strung the whole thing up with yellow yarn.

It was a really easy project but totally set the theme for the shower.


And I just loved the balloons!

So that was about it.  I have a whole bunch more to show you from the shower but I'll leave you with a free printable for the banner.  :)

You need 3-m, 2-o, 1-y, 1-t, 1-b, 2-e, and 4 of the bees to spell "mommy to bee". I have a pink and a blue version for you. Enjoy!

(please be a public follower of sassy sanctuary before downloading.  thanks!)

Download PINK Banner
Download BLUE Banner

Let me know if there are any problems with the download.

As always I'm linking to these great parties and events:

Monday, February 27, 2012

Recipe Card- Free Printable!!!

My Husband LOVES Salsa.  If you were to ask him what his favorite food is he would say "chips and salsa".... if you can even call that a food.  Anyway, I have tried many salsa recipes and tweaked a few to make them my own and thought I had salsa mastered.  Turns out I was only close.

The other day I was browsing Pinterest (of course) and came upon a salsa recipe that intrigued me.  The reason I was so intrigued is that it was my exact "perfect" recipe but with two added ingredients.  Rotel tomatoes and honey.  Weird.  I had to try it out.

Turns out those two little things make all the difference.  This stuff is insane.  My husband thinks he has died and gone to salsa heaven.  In fact, he is on this 6th jar this week. (and 2nd box of Prilosec.)

Well, one of his buddies from work begged for a jar so I made up another batch to send to work.  I wanted to give him the recipe with it too but I don't just give away recipes.... I give away freaking adorable recipes.  :)


 And there is no point in making a freaking adorable recipe card without giving it to you guys too.

(Please be a follower of Sassy Sanctuary before using this image.  Personal use only!)

It's created at 4x6.  Just save the image to your computer and print on card stock.

Oh, and if you want to see the original recipe for the salsa and pay your respects to the salsa queen, you can visit Mountain Mama Cooks HERE.

Enjoy!

As always I'm linking to these great parties and events:

Monday, January 16, 2012

Printable on a Pillow!

I've been looking for fabric to make an accent pillow for my front room.  I wanted something that would tie all the colors together.  So I needed grey, blue, brown and a touch of gold.  But it couldn't be floral because I got a new rug that's floral (I'll show you guys soon)  Turns out that finding what I wanted wasn't such an easy task. 

I've heard about printing on fabric but I had yet to try it, so I decided to try my hand at making my own fabric design by printing at home.  I used the chorus to "I Cross my Heart" by George Strait because its the song my husband and I danced to at our wedding (ahhhh.... cute I know!)

Here is what I came up with.

(Feel free to use the above printable however you want for personal use... not for resale in any form.  Following first would also be appreciated.)

And here is how my cute pillow turned out.


 I'm really proud of it and was pleasantly surprised at how well the printing of fabric actually turned out. 

If you search "printing on fabric" you can find a bunch of tutorials on how to do it.  Some say to soak your fabric in a product (Bubble Jet) to make it colorfast, other say just to iron it after printing to seal the color.  I ended up just using the print and iron method.  Mostly because I was too lazy to try to find Bubble Jet and its sits in my front room and most likely wont get much wear.  Depending on the application, you may want to look into the other method.


That being said, all I did was take some white cotton fabric and some freezer paper and cut them both to the size of printer paper.  Then you iron the fabric to the shiny side of the freezer paper so that your fabric has a backing.  Then print it using your printers best quality setting.  Once the ink has dried you can peel it from the paper and then iron the ink.


Now its ready to incorporate it into a pillow!  I cut my print into a square and then sewed it right onto the front of another square. I used a pretty stitch that had some weight to it.  Then I frayed all the raw edges.  I love the look!   I just made the pillow an envelope style case. 


Now think about all the cute printable that are out there....or better yet... search "printable" on Pinterest.

I know, enough said!  Go make a pillow!

As always I'm linking to these great parties and events:

Tuesday, November 22, 2011

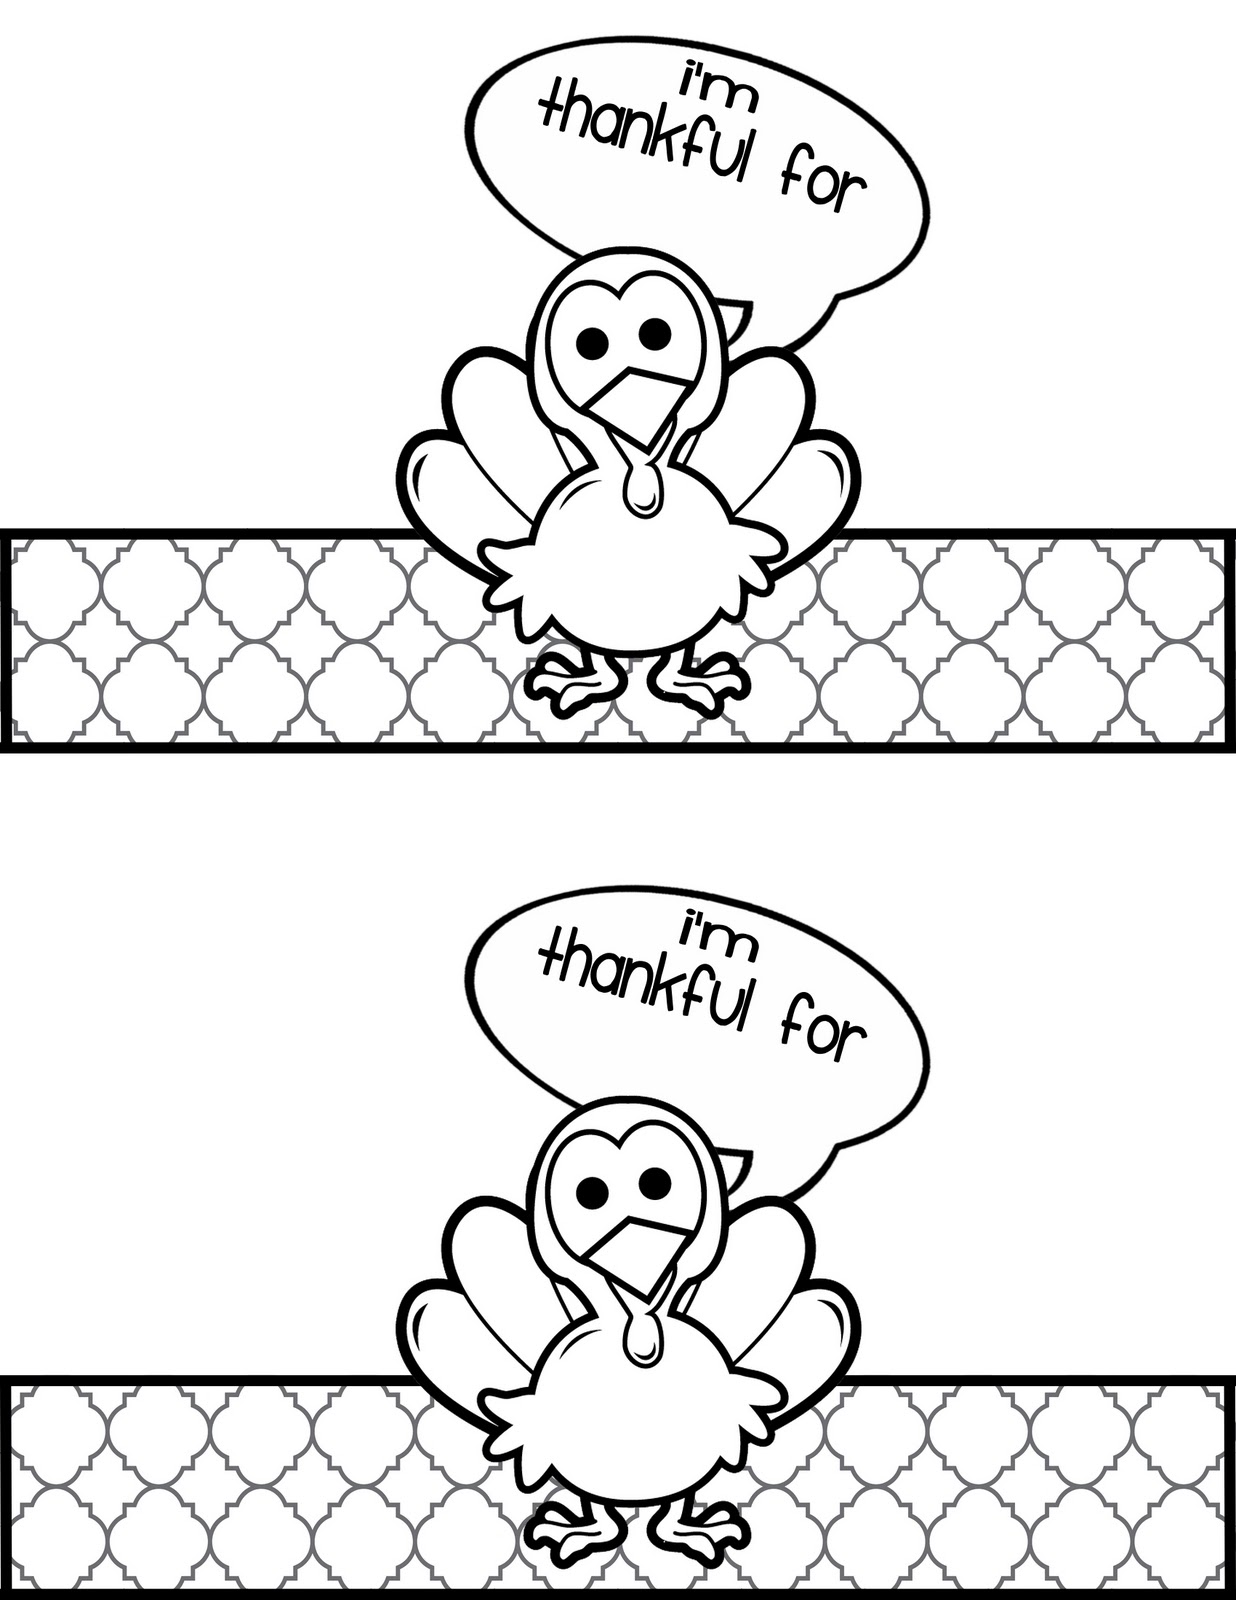
Turkey Place Card Printable- Kids Craft

I know this is super last minute, but I wanted to come up with a little craft for my kids to do on Thanksgiving while we cook.  My thought was that if I could come up something that helped them feel apart of the preparations, maybe they would actually appreciate enjoy the feast more.  So I made these little turkey place cards for them to color.

All you need to do is save the image, print it on card stock and let the kids color.  You can either put everyone's name on the cards or have the kids write things they are thankful for.  Then cut them out, tape them into a ring and use as either a place card or napkin ring.

I made up one as an example.  For this one I just opened the file in MS Paint and colored it that way.  Here is how they look all made up.


 Cute!

I'm sure the kids will have fun making them and it will be cute to see how they color them.

Here is the file


Just click to view it larger and then save the image.  They are created to be printed on a regular letter size paper.

And here is the one I already colored in case you don't have kids to color them for you.  :)  But once again, if you want to do your own colors just open the black and white version in paint and have fun!


I do ask that you please be a follower of this blog before using these files.  And I also want to credit Homemade Preschool for the cute Turkey I used in these printable.

I hope you enjoy and Happy Thanksgiving!!!

As always I'm linking to these great parties and events:

Monday, October 17, 2011

My Crazy Life and a Free Printable!

If you are one of my more faithful followers, you may have noticed that things have been a little slow here on the ole blog.  That's because my personal life had been in complete chaos.  

Let's start with some background info.  My husband and I are high-school sweethearts and we planned our lives together.  When we went off to college, I majored in Interior Design and he in Construction Management.  We were going to be a killer building team.  Little did we know that putting all our eggs in the same basket (the housing market in our case) was not such a great idea.  We did okay for awhile but about 3 years ago everything stopped.  After struggling for about a year, my husband got a big break and was hired as an equipment operator for a nuclear site.  While it was far from our dreams, it paid good and we were happy.

Well, last month he was laid off.  We had no idea how we were going to provide for our family and we were facing the same trial we had just been through.  We were devastated and scared to death. 

Then my Mom, being the complete saint that she is, sweep down and turned our lives around.  She offered to buy a house in Utah for us to renovate and live in while Ryan goes back to school, rent free.  We are so tired of the unemployment cycle and so excited to start over and do it differently.  But that means selling our house and relocating to Utah.  Gah... so much work!

So the next couple months are going to be spent finishing up all the odd-end jobs around our house, getting it listed, packing up, and moving to another state.  Oh, and starting renovation on the new house so its at least livable when we move in! All before my hubby starts school again in January.

It's a tad overwhelming.

There was a quote floating around Pinterest that really stuck me.  It read "Count your Rainbows, not your Thunderstorms."  Simple but profound.  Even though we are going through a trial and I'm sure we will face more before its all said and done, I feel so blessed to be given the opportunity to change things.  I'm so excited for my husband to choose a new career path and that we have the help from an awesome family to be able to pursue it.  So I'm going to focus on the rainbow and not the thunderstorm.

To remind myself of my new motto, I made a printable and hung it on the wall.


And if you would like to remember to count your rainbows too, here is a copy of the print.


Just click on the image to view it larger, save and print.  It was created as an eight by ten.


I'll be back later in the week to share some pictures of the "new" house and some of the big plans I have for it.  So stayed tuned!

*UPDATE:  Just to clarify, I'm still definitely doing blog designs! Yes, I'm busy but my business will come first.  We need at least one source of income! haha  Also, I will still post on this blog and share all the progress of our new house.  It's going to be really exciting to see it all come together! 

As always I'm linking to these great parties and events:

LinkWithin

Related Posts with Thumbnails
Don't stop there! Click "older posts" to keep reading!