
Now that Easter has come and gone, and Mother's day is only 2 weeks away, I'd thought I'd show you guys what I came up with for my Moms (and myself) for Mother's Day this year. If your curious, THIS is what I made last year.
The only problem is I'm not sure what to call them. They are so much more then just a photo frame....

They are basically blocks of wood, decorated to look adorable, with little clips so that you have a place to display those "photos of the moment" instead of just sticking them to your fridge. I just threw a photo in for demonstration purposes, but I plan on printing one of our Hawaii family pictures as part of the gift. Both 4x6 and 5x7 photos work great.
And yes, I made four of them.
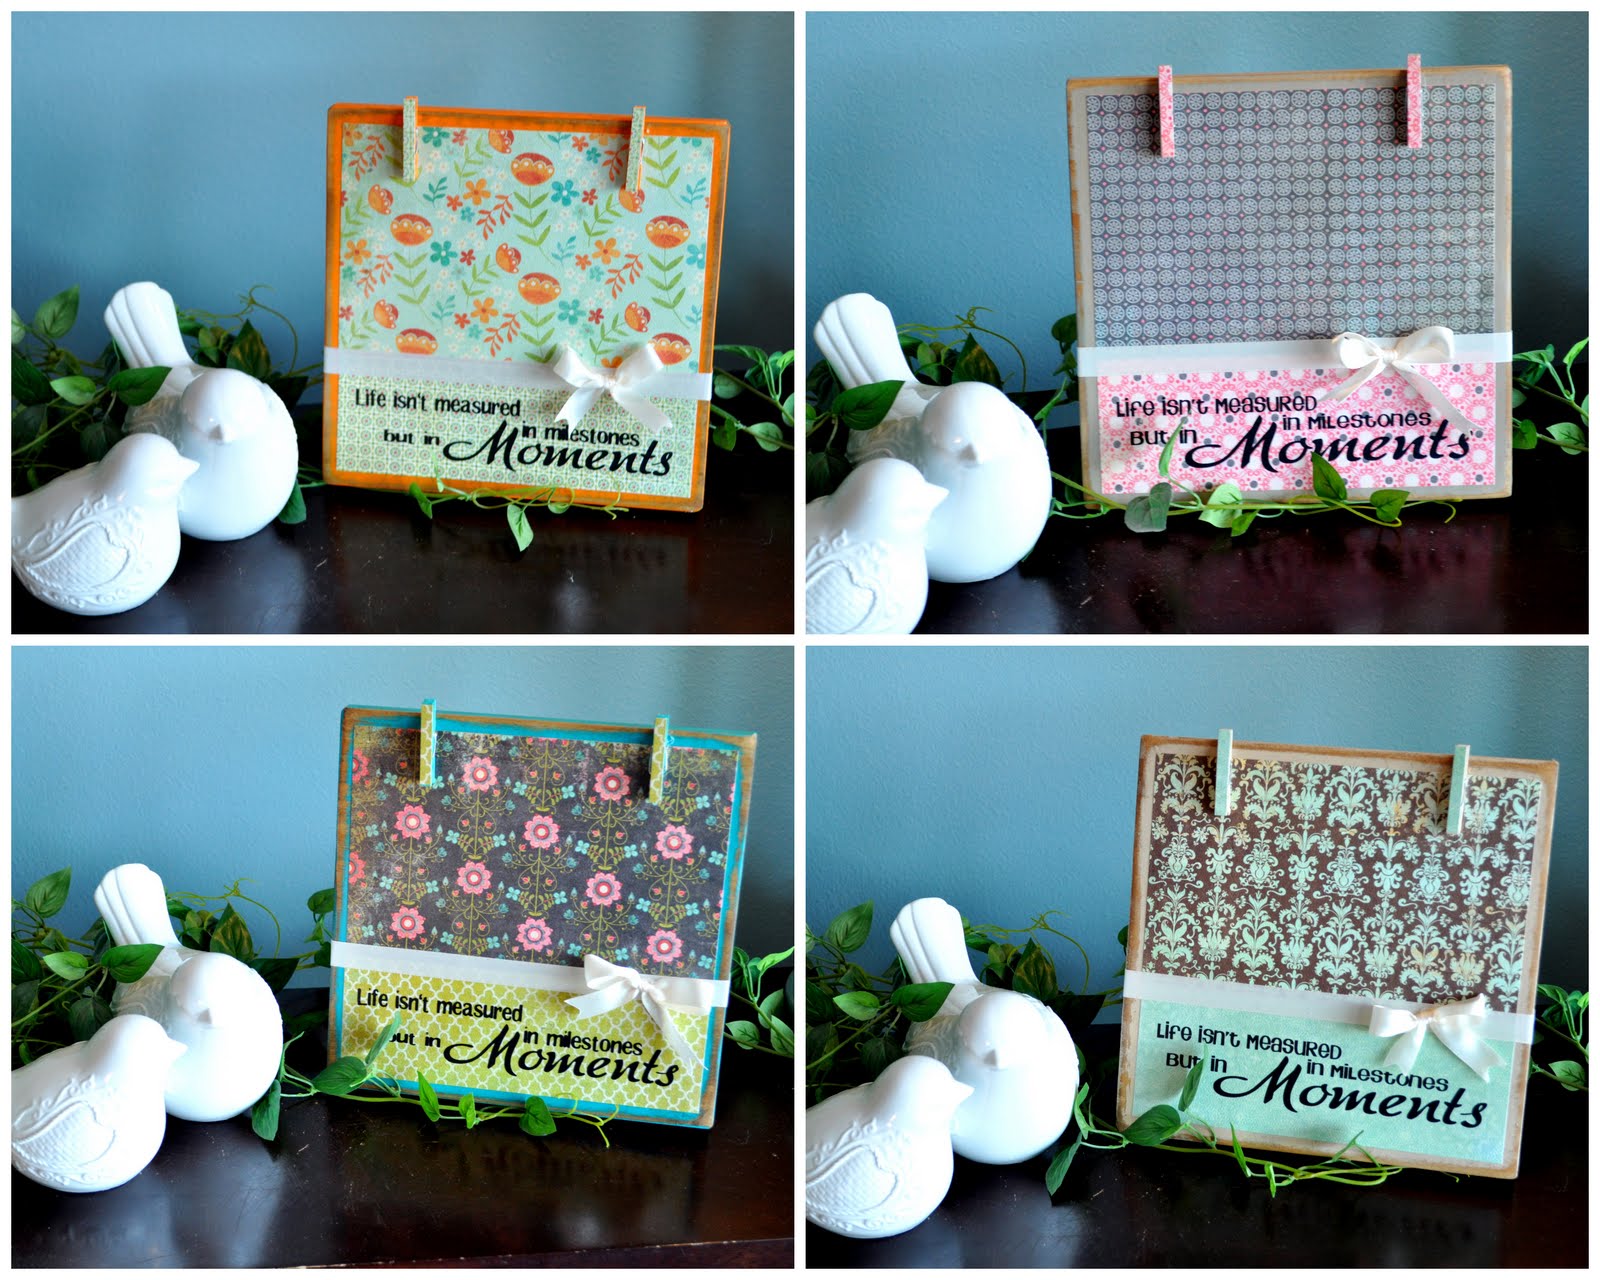
They are all a bit different but I love them all. I had a hard time deciding which one I was keeping for myself!
Want to make your own? Here is the method to my madness.
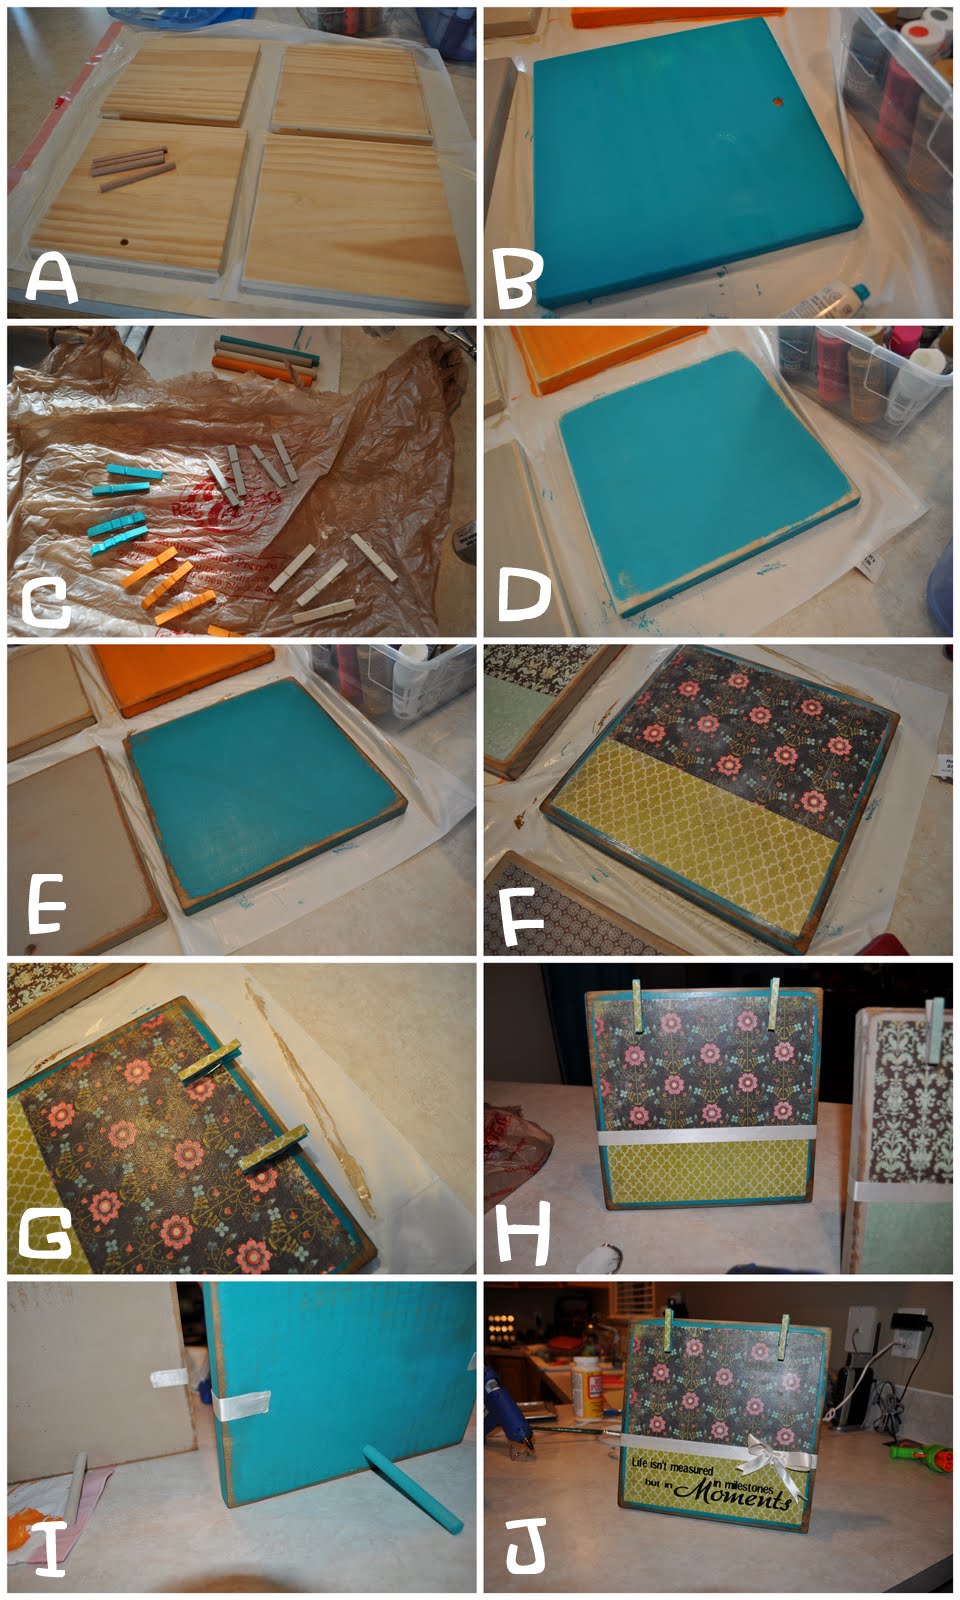
You start out with a block of wood. Mine are 9.5" squares and I cut them from a board from Lowes. You also need a 4" piece of dowel. Then just drill a hole the size of your dowel in the back of your block so that you have a way of making it stand. (image A)
Then paint your pieces. I used little clothes pins for my clips, so I took those apart and painted those too. (image B and C) Then like I do with all my paint finishes, I sanded it down a bit (image D) and put a coat of wood stain over the whole thing. (image E)
Now the fun part. Find a cute piece of scrapbook paper (mine where those great two sided kind) and cut it a bit smaller then your wood. Then cut about 1/3 of that off so you can flip it around and have both patterns visible. Modge podge that in place. (image F)
Then put your clothes pins back together. I used hot glue when reassembling them so that they would stay together better. I also used a scrap of paper on the pin. Then glue those to your boards. Use a photo to determine the placement. (image G)
Then I put a strip of ribbon over the seem where the two papers meet. I just hot glued it down and to the back. I didn't worry about the backside too much. (image H and I) Then finish it off with a bow and a quote. I cut my quote out of black vinyl with my silhouette, but you could get creative here.


And that's it! Clip on a cute picture and you have a gift that anyone would love!
As always I'm linking to these great parties and events:


