Friday, March 19, 2010

Pillows!!!

The greatest thing about making your own custom roman blinds is that you can make custom throw pillows that match! And the greatest thing about making custom throw pillows is that you can make them envelop style. So when grimy fingers use your pillow as a napkin, you can put the covers in the wash!


I made four covers to go over some existing pillows using the leftovers from my blind project. I then made two more "basket weave" pillows to accent with. They are so pretty! My pictures really don't do them justice. Isn't the basket weave divine?


So... do you want to make your own?

Supplies:
fabric (I got one yard to make two pillows and had some left over.)
ribbon (I used three spools of sheer ribbon per pillow but it will depend on the size of your pillow.)
pillow form
sewing notions


Step 1: Cut out a piece of fabric for the face several inches larger than your pillow form. You want to consider the fullness of your pillow and hem allowance.

Step 2: Cut out two more pieces the same width and about 3/4 of the length of your face fabric.

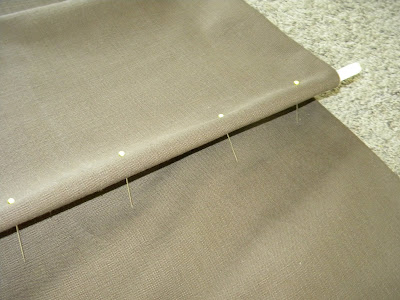
Step 3: Starting in one direction pin your ribbon in strips next to each other, pinning on both ends till you cover the entire piece.

Step 4: Start weaving by taking strips of ribbon and place them over, under, over, under... in the opposite direction. You will alternate every other strip. Once it is in place, tuck it next to the edge (or previous ribbon) and pin both ends. (I'm sure all of you know how to weave but I'm trying to make this thing thorough, but man its hard to explain in words!)

Step 5: Sew a top stitch as close to the edge as possible in order to hold everything in place while you work with it. Then trim around the piece. (At this point you could take some binding tape and bind the edge to make a beautiful place mat)

Step 6: Take your other fabric pieces and turn over and sew one of the edges. You may need to trim these pieces as well depending on how much you trimmed your face piece.

Step 7: Place the right sides together with the two back pieces overlapping. The turned edges should be in the center. Pin in place.

Step 8: Sew all around your pillow. Once done, clip the corners so they will be sharp when turned.

Step 9: Turn your cover right side out and stuff your pillow in. You may need to adjust the ribbon when done. And there you have it!

Note: the other pillow covers where made the using the same method as above.


Simply beautiful!

Tuesday, March 16, 2010

Dish towels that stay put!

I like to hang a dish towel over the handle of my oven door. When I have a dish towel out and ready, I end up using way less paper towels. This is good for the environment and good for my pocketbook. However, my 18 month old daughter WILL NOT LEAVE THEM ALONE! After picking them up for the hundredth time I decided I needed a solution. I remember my Mom having a towel with a crocheted top that buttoned to keep them in place, so I decided to make a more contemporary version of that. So, what do you think?


Want to make your own?

Supplies:

4 dish towels (one you will sacrifice for the binding and straps... I will refer to this towel as the secondary towel)
6 buttons
Sewing notions


Step 1: Fold your dish towel how you want it to hang. I folded the two sides into the middle and then the whole thing in half. Then cut out of your secondary towel a strip the width of your folded towel and about 4 to 5 inches long. Also cut out two pieces the width and length you want your straps.

Step 2: Pin your towel so that it stays in place while you work with it. Just be sure to place the pins low enough not to get in your way.

Step 3: I decided to leave my edges raw. (lazy) The edges will fray but I was okay with that. To keep them from fraying to much though, I did a zigzag stitch all around the perimeter of my pieces. If you want a cleaner look, you should cut your fabric a little larger and hem.

Step 4: Attach your straps to the back of you binding piece. I did this by sewing a square.

Step 5: Sew a button hole on the end of your strap. This was my first experience making a button hole and it was surprisingly easy.

Step 6: Align your binding with your towel. Make sure the straps are in the back and the binding is even on both sides. Pin and then sew in place by making another square around the binding.

Step 7: Hand sew on your buttons and your done!

There you have it. A dish towel that stays put!


So which one is your fave? (And no, I will not actual hang them all at once!)

Thursday, March 11, 2010

Roman Blinds

We recently finished our basement and I have been slowly decorating. We have a large family room down there with two big windows. Since this is our main TV viewing area I decided to make roman blinds in a dark fabric for ultimate light control. My mom has a pair of roman blinds in her house so I studied the construction and this is what I came up with.


Not to shabby huh?


It even looks great when its folded up at the top.


When I went shopping for fabric I fell in love with the print. Of course it was a remnant and they only had about a yard and a half. So I decided to use it as an accent along the bottom and do the rest a solid color. Although I love the final outcome, it would have been much easier to use only one fabric.

So do you want to know how to make your own? Well, okay then. Here is a diagram I made that should help you understand the basic construction.


(you can click on the diagram to enlarge)

Step 1: Measure your window and determine the size you want your blind. You will want to add a couple of inches to the width for seam allowances and about 20 inches to the length. Cut your fabric. *Because I did the accent panel at the bottom I decided to make my blind two layers so there would be no raw edges in the back. I cut out two panels per window.


Step 2: Hem the sides and bottom edge. If you are doing two layers, sew the right sides together and then turn.

Step 3: Now we need to make pockets for the dowels. This is where the blind will fold when it is raised. You need to determine how many you want for your blind and space them evenly. I used five. Using the dowels as a guide, fold your fabric so that a pocket is formed on the back side of the blind, pin in place and sew.


Step 4: Next trim your dowels down. They should be about an inch shorter than the width of your blind. Put them in the pockets and hand stitch closed. (For those who read my family blog, this is what I needed a hacksaw for.) This is what the blind should look like from the front at this point.


Step 5: Hand sew three plastic rings on each dowel. One should be in the middle and the other two about 4 inches from the edge.


Step 6: You need to get a 1x3 wood board cut to the width of your blind. Measure the exact height of your window and transfer that measurement to the blind. Place the narrow edge on the fabric at the right height and than wrap the fabric around and staple.


Step 7: Screw in a eye hook even with the plastic rings and an additional one a couple of inches from the edge you want your cord. (see diagram)

Step 8: Tie a knot on the bottom ring with your cording. String the cord through the rings above it and through the eye hooks and out. Do this on all the bottom rings. You should have three cords. (once again, see diagram) Place a blind pull on the end and tie off.

Step 9: Place the blind in your window and screw into place. We used three screws and pre-drilled holes to be sure we got it just right. Than place an anchor hook on the side of your window. When you open the blinds simply wrap the cord around the hook to keep in place.


There you have it, custom roman blinds.

Monday, March 08, 2010

A Bit of Spring

The weather is starting to turn and I am so excited for spring! I decided it was high time to retire the winter wreath on the front door. I made a simple spring wreath using a vine wreath from the craft store, some artificial apple blossoms and green ribbon. It was super simple but looks so soft and pretty. Ahhh... I love you spring!


EDIT: I was asked to give more detail on how I made this wreath. It was super simple. All you need is a vine wreath, about three or four bunches of faux apple blossoms, green ribbon, and a hot glue gun. Cut the blossoms off by branch and tuck into the wreath, gluing in place where needed. Be sure to go the in the same direction. Once the wreath is covered fill in any holes by gluing down individual blossoms. Make a simple blow with your ribbon leaving the ends about 18" longs. Then make another bow but cut the ends off this one. Glue the two bows together and then glue another little piece around the bow center to give it a uniform look. Glue it to the wreath and then tuck the bow ends into the flowers, gluing where needed. Hope this helps, if anyone decided to make this I'd love to see a pic!

LinkWithin

Related Posts with Thumbnails
Don't stop there! Click "older posts" to keep reading!