Showing posts with label seasonal. Show all posts

Wednesday, December 08, 2010

Yarn Cone Trees

I have seen so many adorable cone trees lately! So when I decided my mantle needed more height I jumped on the band wagon and made these!


Now, I didn't bother to take pictures along the way, but I will tell you how I did it....

I took some foam cones and wrapped them with yarn.  The End.

Seriously, it was that easy.  I did use a little hot glue to keep things in place along the bottom and the top.  A also stuck a couple star picks I got at Micheal's into the top.  These were the easiest project ever.


I just love the texture from the yarn!


They added the height and color I needed.  Love them!


So have you made any cone Christmas trees yet?  Well, what are you waiting for!? Get to it!

Monday, December 06, 2010

Frame Christmas Card Holder

When I got my Pottery Barn and Ballard Design Christmas catalogs in the mail, I immediately started scouring them for knock-off ideas.  I got a bunch of great ideas from both that you will see more of, but one was this awesome Frame Card Holder.  The best part, it was only $199.00! (gasp, choke, cough)

Gilt Frame Card Holder

All it is is a frame with some wire strung across it, good grief! I love having a place to display all the cute cards we get each year (and actually keep all my old cards) so I knew this would be the perfect knock-off.  And guess what, mine was FREE!  (you saw a sneak peek when I showed off my mantle display)

Pretty cute!  Now, I did change things up from how pottery barn did theirs but that just makes it all the better right?!?

Here's what I did.  It all started with this picture I got for free at an antique store. A girl friend and I were scouting for frames for another project (more on that later) and the shop owner gave us two of these bad boys for free. Ahhh, love nice people!


Ain't she a beauty! 

All I did was remove the picture and paint the frame.  I did a red base coat, then a coat of white, then sanded that down to expose a bunch of the red.  Lived with it for a day and decided I hated it. (tell me you guys do that too!) So I decided to crackle it.  I painted a layer of Elmer's Glue on it, let that sit up till it was tacky, but not all the way dry, and then did a coat of blue.  Once everything dried I ended up with this lovely finish.  Love it!


I then took that same lovely picture I removed, turned it over and painted the back side a dark brown.  Once that was dry, I took some yarn and wrapped the board, taping it on the back to secure like so....


Then just pop it back in the frame, and there you have it!  You can either slide the cards between the strings like I did, or you could get little clips.  Either way its a super cute and fun way to display those Christmas cards!


These are actually cards form last year.  That's my adorable little nephew.  I can't believe how much he has grown from last year!

Well, there you have it! A frame Christmas card holder.


Take that Pottery Barn!

Linking to THESE parties and events:

Monday, November 29, 2010

Christmas Wreath

You can't decorate for Christmas without making a wreath!  Here's the one I made.


It so sparkly, I love it! Plus it was super easy to make, love that too.

Here's my method.

Supplies
A wreath form.  I used a vine wreath so I didn't have to worry about some of it showing, but whatever if fine. 
Leaves. Buy whatever is cheap because you are going to make them pretty later.  I used two sprigs of holly leaves. 
One bundle curly sprigs.  Not really sure what you actually call these, but here is a picture. (you can see my leaves too)

Glitter.  You can buy nice glitter or you can buy cheap glitter.  While the nice stuff would have been...well... nice, I am cheap and got the cheapest stuff I could find.
Glue.  You will need both hot glue and craft glue. (I actually used modge podge because it was easiest to find in my mess)
Ribbon

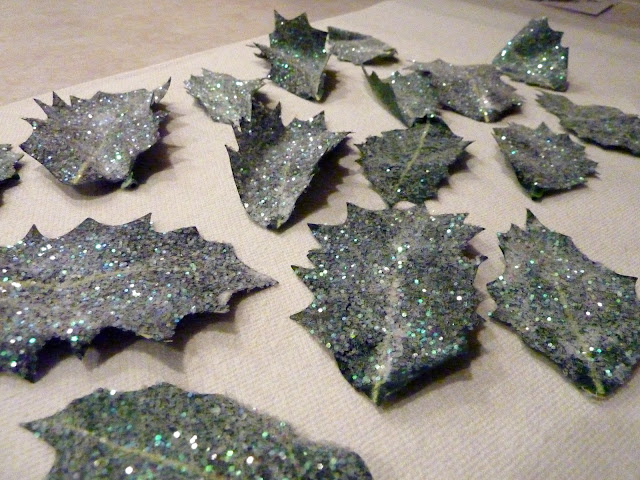
All you do it rip all the leaves off, paint them with glue and cover in glitter.


Once they are dry, arrange them around your wreath form however suits your fancy.  I made mine go all the same direction.  Hot glue into place.

Add your curlies...


Top with a bow...


Hang and enjoy!


I told you it was easy! 

As always, linking to these parties and events:
  Creations by Kara

Wednesday, November 24, 2010

My Fall Mantle

I figure I better show you all my fall mantle since everything will be going Christmas with-in a few days.

(This is where you say, "But Krystal, I distinctly remember you crying about the fact that you don't have a mantle to decorate for the holidays.")

Yes, its true.  I don't have a fireplace. (sniff) But my husband must have been tired of hearing me cry myself to sleep over it and built me this.


Holy Gorgeous, I love you!  Its the perfect place to showcase my seasonal decor and I am in LOVE.  It lives in my entryway so we added the hooks so it would "make sense" and guest would have a place to hang a jacket.... and I could hang my stockings.  (Okay, fine.  I admit it.  I designed it specifically around hanging stockings.) 

Here is a close-up of the beautiful finish that I did all by my lonesome.  I'm a little proud.


And a few more of the display.


So there you have it.  My fall mantle.  I can't wait to show you what it looks like all decked out for Christmas!

Monday, November 01, 2010

Reversible Bunting Banner

Okay guys, I finally jumped on the bunting banner wagon and made myself an adorable trick-or-treat banner. 


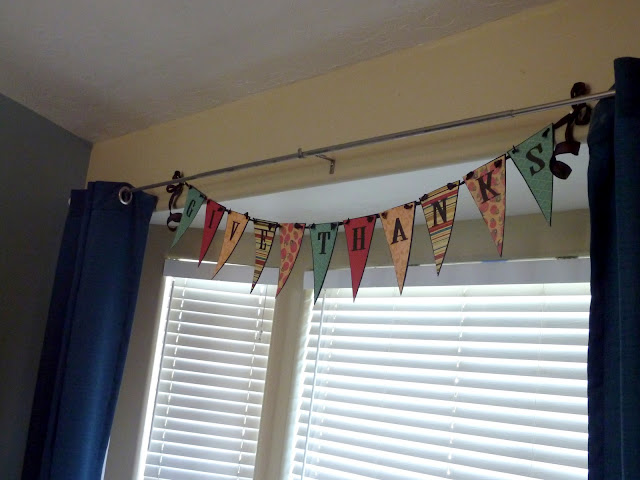
Isn't it fun?! Now I know what your thinking, your thinking "uhh, Krystal, Halloween was yesterday so we really don't care about your trick-or-treat banner.  Yeah its cute, but that information would have been nice LAST WEEK!" Well, never fear.....this banner is reversible!


I love it so much! I'm over here doing the happy dance because I am REALLY proud of myself on this one! Its not your typical bunting either.  I wanted to make something with some substance that would hold up and use materials I felt comfortable working with.  That's why the typical paper (to weak) and fabric (I'm just not that talented of a seamstress) banner was out.  So this one is made with craft foam and scrapbook paper.
Do you want to see how its done? Okay fine, you twisted my arm.


Step 1: Prep.  Cut out 11 triangles from your craft foam.  I used 2 sheets of black.  I recommend making a pattern out of paper.  Cut out 11 more slightly smaller ones from various Halloween papers and 11 from various Fall/ Thanksgiving papers. Also cut out paper letters to say "TRICK or TREAT" and "GIVE THANKS" (see image A)  Note: the "or" will be on one pennant and there will be one blank pennant between give and thanks.

Step 2: Make an assembly line and modge podge a paper onto the foam.  Pick one side first and just go with it.  You can immediately add the letter and then set aside to dry.  (see images B and C)  When you set them aside, line them up as they would appear when hung.  This will keep you from getting confused. (see image D)

Step 3: Once that side is dry, you can begin the other side.  Repeat the same process but remember the first letter will be on the last pennant of the side you just finished.  So work from the back to the front. (See image E)

Step 4: Once everything is dry, take a hole punch and punch a hole into each top corner. (see image F) Then take a piece of ribbon about 6 inches long, thread thru the hole and tie a knot.  I trimmed the ribbon and seared the edge with a lighter to give it a finished look. (see image G) Then add a pennant to the ribbon and tie a second knot as far apart as you want your pennant. Finish that edge like you did before. (see images H and I)  You want to be sure that your knots all end up on the same side of the banner.  I did them on the "give thanks" side, but it doesn't really matter as long as you are consistent.  (see image J)  Do this for all the pennants leaving extra ribbon at the ends to hang with.  Enjoy!

Now, if you want to make a Thanksgiving and Christmas banner instead, you can still do "give thanks" on one side and "Christmas" on the other with the first and last pennant being blank...OR...wait for it..... the Christmas side can say "Let it Snow."  I know, I'm good.

Now for some more pictures of my adorable two-sided banner!


Now go make one! And if you do a Thanksgiving/Christmas one, promise to send me a link.  I'm dying to see one done!

I'm linking to these weekly parties and these events.

Sawdust and Paper Scraps
 

Creations by Kara

Monday, October 25, 2010

A haunted house, spider web, and window clings.

So do you remember when Crafty Sisters made the cutest little Halloween village out of bird houses? Well, I totally copied them.  I only made one house but still I think it turned out pretty cute and is a fun addition to my Halloween decor.


As always, I had to get a "front step shot" so I could get a good pic.  But I thought I'd show you what it actually looks like mixed into my "stuff" too.

All I did was paint a craft store birdhouse black and then "decorate" the back side of it with scrapbook paper and embellishments.  It was a fun project.

And since we are on the topic of coping my fellow bloggers, here is one more.   I was asking my husband the other day if he thought our front door Halloween decor (Say that 10 time fast!) was cute, and he said "Well, yeah but its a little boring."  We can't have that! So I totally copied Staci at Craftify It and made a yarn web in my front window. I then put up some fake cobwebs and a few more spiders and now it looks a lot more "done."  (We still need a few big pumpkins on the steps but we haven't made it to the pumpkin patch yet.  Were getting there!)


But I do have one original idea for you!  After making my haunted house, I had a bunch of adorable Halloween scrapbook embellishments left and I was determined to use them somehow.  I had heard that you could use hot glue to make window clings, so I grabbed a few, put a bunch of glue on the back, let them dry and stuck them to the window.  It worked great... until the sun went down.  As soon as that glass got cold they all fell off. (pout)  I'm not easily deterred though so after some research I found that there is actual "window cling" paint. So I got a bottle of this...

And did this...


And now I have this!


It worked perfect! Make sure your glue dries completely before putting them on the window, but since it dries clear, it looks cute from both sides. (my embellishments were two sided.) Oh, the possibilities are endless!

Monday, October 18, 2010

The (not so) Itsy Bitsy Spider

I really hate spiders.  Or at least I really hate real spiders.  But during Halloween I think spiders are a lot of fun to decorate with so I set off to create a big old spider to hang from the light by my front door.  He turned out SO cute too! I just love him! Wanna see?


Isn't he fun!?!  Here are a couple more close up.


And here is the front door so you can see it all together.  It really is big.  I would totally die if I saw a real spider that size, but he is too cute to be scary.


So, do you want to make your own? It was really easy and fun! Here's how.


You will need:

6" Styrofoam ball
black paint
black glitter paint (optional)
1 large puffy chenille pipe cleaner.  Not sure what they are really called, but I found it at Micheal's with the rest of the pipe cleaners.
3 googlie eyes. (that's the technical term) Or however many you want your spider to have.
hot glue
string or yarn

Step 1:  Paint the ball black and let dry.  This was the hardest part of the whole project because it took forever to dry and I'm not the most patient crafter.
Step2: Do a coat with black glitter paint.  While the glitter added a little, I'm not sure it made enough of a difference to be really worth the extra step.
Step 3: While that is drying, cute two 2-3 inch pieces off your pipe cleaner for the fangs.  Divide what it left into eight pieces for the legs.  I gave the fang pieces a little hair cut so they weren't to furry.
Step 4: Once the ball is dry, decide which side is the front and hot glue on a couple of eyes.  I started with two and later added the third.  Use a pencil or something to make a hole in the ball.  Add some hot glue into the hole and push the fang in place.  Do the same thing for the legs.  Shape the legs to look like legs by bending a the "knee" and giving a little foot.
Step 5.  Add another hole to the top.  Tie a big knot in your yarn and use the pencil to shove the yarn into the glue filled hole.  Add a little more glue on top for extra measure.
Step 6: Hang and enjoy your cute new friend!


Linking up to these parties and these events:

Visit thecsiproject.com 
Creations by Kara

LinkWithin

Related Posts with Thumbnails
Don't stop there! Click "older posts" to keep reading!