Not to shabby huh?

It even looks great when its folded up at the top.

When I went shopping for fabric I fell in love with the print. Of course it was a remnant and they only had about a yard and a half. So I decided to use it as an accent along the bottom and do the rest a solid color. Although I love the final outcome, it would have been much easier to use only one fabric.
So do you want to know how to make your own? Well, okay then. Here is a diagram I made that should help you understand the basic construction.

(you can click on the diagram to enlarge)
Step 1: Measure your window and determine the size you want your blind. You will want to add a couple of inches to the width for seam allowances and about 20 inches to the length. Cut your fabric. *Because I did the accent panel at the bottom I decided to make my blind two layers so there would be no raw edges in the back. I cut out two panels per window.

Step 2: Hem the sides and bottom edge. If you are doing two layers, sew the right sides together and then turn.
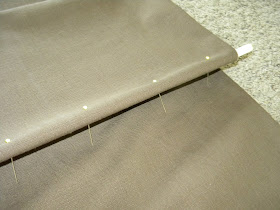
Step 3: Now we need to make pockets for the dowels. This is where the blind will fold when it is raised. You need to determine how many you want for your blind and space them evenly. I used five. Using the dowels as a guide, fold your fabric so that a pocket is formed on the back side of the blind, pin in place and sew.

Step 4: Next trim your dowels down. They should be about an inch shorter than the width of your blind. Put them in the pockets and hand stitch closed. (For those who read my family blog, this is what I needed a hacksaw for.) This is what the blind should look like from the front at this point.

Step 5: Hand sew three plastic rings on each dowel. One should be in the middle and the other two about 4 inches from the edge.

Step 6: You need to get a 1x3 wood board cut to the width of your blind. Measure the exact height of your window and transfer that measurement to the blind. Place the narrow edge on the fabric at the right height and than wrap the fabric around and staple.

Step 7: Screw in a eye hook even with the plastic rings and an additional one a couple of inches from the edge you want your cord. (see diagram)
Step 8: Tie a knot on the bottom ring with your cording. String the cord through the rings above it and through the eye hooks and out. Do this on all the bottom rings. You should have three cords. (once again, see diagram) Place a blind pull on the end and tie off.
Step 9: Place the blind in your window and screw into place. We used three screws and pre-drilled holes to be sure we got it just right. Than place an anchor hook on the side of your window. When you open the blinds simply wrap the cord around the hook to keep in place.

There you have it, custom roman blinds.

